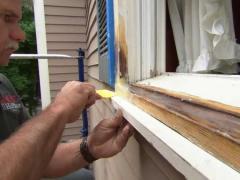
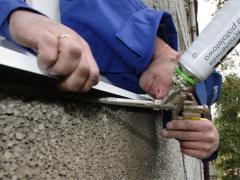
Instruction on how to replace a window sill with your own hands properly.
 You can have some problems with your window sill due to its age:
- rottenness,
- cracks and other kinds of mechanical damages,
- it’s quite old and it has lost its pleasant look.
So a question may appear – how to replace a window sill on your interior wall?
As a rule window sills are installed together with windows since their installation requires careful sealing and it is necessary to process the entire structure in general. In this case you want to replace your window sill for some reason, but you are happy with the existing window, you need to dismantle the old sill carefully and to install a new one. It often happens that the window is still strong and good-looking and there is no need to change it, but the state of the sill is already poor. Concrete and wooden window sills often have to be painted because of high humidity on the exterior walls, temperature changes outside and at the window zones, etc. Window sills made of PVC are more practical, they do not need to be painted, they are easy to wash and clean. Work on replacing the sill is quite dirty, so it’s best to do it before the general repairing works or general cleaning of the living space to avoid serious dusting of different surfaces. The following instructions will tell you how to replace a rotten window sill without removing the window.
You will need:
 A roulette – to measure all the necessary parameters of the sill accurately (How to measure for replacement windows).
- A level – not to put the window sill crooked.
- A punch with a flat nozzle.
- An electric jigsaw – to fit the new size of the window sill.
- Some boards – to do “beacons”.
- Silicone sealant – to seal joints between the window frame and the new sill.
- Foam – to fill all voids.
Dismantling of the old window sill
First it is necessary to dismantle the old window sill. To do this you will have to hit the concrete (or timber) with a hammer or with a punch for quite a long time to break it. On the edges of the window opening you should continue hitting with your hammer or a punch unlit 4 inches deep niches appear. You should hit along the entire length of the slope. Then lift an old window sill with a sharp movement and pull it out of its niche.
Before installing the window sill it’s necessary to define its material.
 Nowadays there is a variety of options while choosing a window sill, even the exotic granite countertops.
- The most practical and inexpensive option for window sills is PVC, but the sills made of PVC are not very environmentally friendly, that’s why they are most often chosen for offices.
- Chipboard or MDF are durable and quite good-looking, but the slightest damage to their outer layer will lead to swelling as the inner layers of these materials have a tender of moisture.
- An excellent option for the window sills are timber or artificial stone, but these options are not something that everyone can afford.
You also need to choose the right size of the new sill:
- the width is taken as it is needed,
- the length should be slightly larger than the length of the window.
Installation of the new window sill
- After you removed your old sill, the vacant place is cleaned of solution, construction debris and dust carefully.
- On its both ends the sill is cut into the necessary parts to fit the window opening. It is important not to leave gaps at the walls, but it is necessary to leave the necessary place for installation (for the alignment with a level).
- While using window sills made of MDF, chipboard or solid wood, the raw ends are covered with sealer to improve moisture resistance.
- If the old sill height is greater than the height of the new one, it is possible to make a cement screed of the desired height on the sill niche.
 For installing of window sills the mounting foam is traditionally used; it is applied to the longitudinal strips. The first strip is applied around the window (this will also be an additional protection against the cold), then the second strip is applied at any distance.
- If the sill is mounted on wooden blocks, the foam is applied between them. Then the sill countertop is
- installed. Rear and side grooves also foamed.
- The window sill is aligned with the level, then the emphasis to the top of the window opening is made. After hardening foam expands, so the gap will not allow it to break the alignment level.
- The spacer cargo is set on the window sill, then the fabric is foamed underneath.
- After the complete hardening of the foam (it usually takes 24 hours), cut the excess foam. The joints between the window frame and the sill should be processed with silicone sealant.
- You should be super careful while working with foam as it is very difficult to clean if you allowed some “drops” of it to stay on the window glass or anywhere else. If it happened, you should not scrape it with a knife or other sharp objects, it is better to use chemicals.
We hope this article helped you to find an answer to the question how to replace a window sill inside your living space with your own hands in a proper way.


Single-hung and double-hung windows have pros and cons. Here’s how to know which is right for your home.