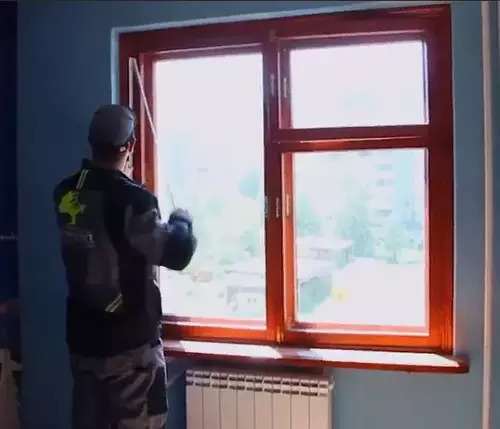
Installation of windows is the most important stage on which the microclimate of the A-frame house premises and the comfort of its occupants largely depends.
The main part of heat loss in the house occurs through the window and door units, so it is so important to approach responsibly to the installation of windows in A-frame house, take into account all the nuances and avoid mistakes that lead to the appearance of thermal bridges.
Types of windows
The most common window frame materials are plastic and wood.
To make the right choice, you need to consider the disadvantages and advantages of profiles made of these materials.
Wooden windows: pros and cons
Windows made of wood have many advantages:
- environmental friendliness and safety: the wood material does not emit toxic substances
- Durability (subject to proper care with the use of compounds);
- simple repair thanks to the ease of wood processing;
- improvement of the microclimate in the room;
- good heat-protective characteristics;
- undeniable high aesthetic qualities.
Nevertheless, structures made of wooden profiles are not without some disadvantages:
- the complexity of installation with their own hands;
- risk of fire;
- high cost and expenses in operation;
- moisture absorption.
Plastic windows: pros and cons
The wide popularity of PVC windows is explained by their following advantages.
- durability in the absence of special maintenance;
- high reliability of the window construction;
- indifference to the effects of pests;
- resistance to various atmospheric phenomena;
- the frame retains its rigidity for a long time;
- good soundproofing ability.
In addition, attention should be paid to the disadvantages:
- susceptibility to the formation of condensation, which, in turn, often provokes the appearance of mold;
- less repairability compared to wooden ones.
Windows in A-frame house: wooden or plastic?
Of course, the choice of window profile material everyone makes himself, based on his personal preferences, but it is worth approaching this issue from different angles.
- Firstly, it is impossible to say that frame structures consist entirely of wood, because not only natural materials are used as insulation and finishes. This means that the windows made of plastic will not have too much effect on the environmental design of the house.
- Secondly, PVC windows have a lower cost.
- Thirdly, you can achieve a similarity in the appearance of the windows and the material of the house, as there is a possibility to laminate the PVC profile under different types of wood.
The above factors contribute to the fact that the owners of A-frame houses choose plastic windows more often.
Panoramic
The floor-to-ceiling height of such windows gives maximum natural light illumination. They can have a folding or sliding design, which is highly reliable because they are made of high-quality reinforced glass. They are ideal for glazing recreation rooms.
The window area should not exceed 6 square meters. The design of a larger size will not cope well with the load of wind and other adverse factors.
General recommendations
Before installing window units, you should familiarize yourself with the basic rules and recommendations. Determining the number of windows in the room, you must first consider the area of the room and its purpose. In large rooms, install, as a rule, two windows on different sides. In smaller rooms can be limited to a single three-window window.
As for the height, its optimal value, measured from floor level, is within 31-35 inches. This ensures the necessary visibility, regardless of the position of the person (sitting or standing). In kitchens it is recommended to place window blocks at a height of 40-48 inches from the floor, so you can achieve better lighting.
In addition, requirements for natural light set the maximum distance from the ceiling surface to the upper edge of the window 12 inches.
See also: How many windows a room should have?
Installation of wooden windows
Due to their low cost, the most popular are the PVC windows. Nevertheless, brief information on the installation of wooden windows in A-frame house can find its application in certain cases.
Materials and tools used

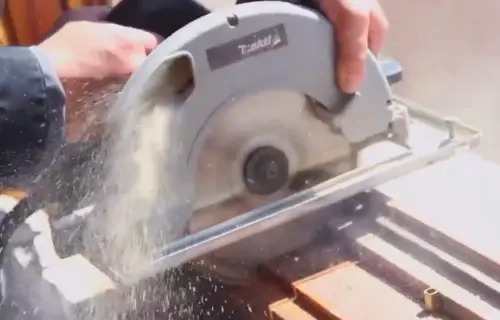
To install a wooden window, the following tools are required:
- power tools (jigsaw, drill);
- hand tools (hammer, hacksaw, screwdriver);
- Consumables (self-tapping screws, nails, etc.);
- construction level;
- plummet;
- wooden pads:
- installation foam.
Preparing for installation
First of all, the surface of the opening should be cleaned of dirt. Then the opening must be treated with antiseptic, and after it dries, proceed to install the unit.
Installation procedure
Installation is carried out in two stages. Firstly, the box is installed, and only after that is glazing.
Fastening of the underlay is carried out with nails.
Glazing is done as follows. The surface of the rebate is treated with a special silicone sealant that can hold the glass. The glass is placed on it and pressed down. The frame is attached to the box on special hinges, and then the sashes are closed.
It should be borne in mind that the size of the box should be less than 0.8 inches than the opening in which it is installed. It will allow without difficulties to align the window unit on the level and accurately fill the gaps with assembly foam.
Plastic windows installation
There are a number of peculiarities of installation of window units in A-frame building, which must be taken into account so that the windows will last long enough.
In a house that is built on a frame technology, to preserve the structure of the building and a comfortable microclimate of its rooms, after sheathing the walls, you arrange waterproofing of window jambs with special insulating films. The inner side is covered with a vapor barrier film, while the outer side is covered with windproof and waterproofing film. Both materials should cover the opening completely. To this end, the moisture barrier film is laid with an overlap in the areas of window openings and secured along the perimeter with a stapler. Then the film is trimmed, tucked into the opening and fastened finally.
Tightness of the insulation layer is an important necessity for A-frame houses, affecting the preservation of heat in it.
After the measures to protect the slopes, you can proceed directly to the installation of plastic windows in the A-frame house.
Used materials and tools
- Screwdriver, Torx bit;
- Blunt chisel;
- Alignment hammer with silicone beater;
- Drill and bit 0.2 inches (for the dowel) and 0.5 inches (to install a plug over the dowel)
- Level
- Foam gun
- Assembling foam
- Wraps (vapour barrier, moisture barrier and sealing foam).
- Screws or plates
- Alignment plates
- Square (optional)
- Laser level (optional)
Preparing for installation

The windows must also be prepared before installation. For this purpose, the ends of the window units are covered with mounting tape, the outer side with a moisture barrier and the inner side with a vapor barrier. It is very important not to forget about it, because getting wet will lead to a decrease in the thermal protection ability of the assembly foam.
When the openings are prepared, there is the most important question: to put a plastic window in the A-frame house with your own hands or to attract professionals? Of course, you can significantly save on installation fees, but without serious experience in such work, it is better not to undertake the installation of the window yourself. The ideal solution is to familiarize yourself with all the nuances of window unit installation and, applying the knowledge gained, control the work of the masters.
In case a plastic window in a A-frame house is installed by professionals, you should check the reliability of mountings of the sills, the quality of the seal of the joints with the outer soffits, the level of the window sills and the absence of gaps in the areas where they fit under the window before signing the act of executed work.
Sashes must open freely without touching the frame. If the window sash is half-open, it should not move independently in the closing or opening direction. This is to check whether the window is level. If the sash does not fit tightly to the frame, it indicates a defect such as a bend in the plane of the frame.
It happens that when the installers press the installed insulating glass unit with the slats, when the slight click of the slat closing, the glass may crack. If such a defect is present, you should insist on replacing the insulating glass unit.
Unfortunately, besides the abovementioned, there are hidden defects that can appear after a long time (for example, frosting of window jambs). To avoid this kind of trouble, you should closely monitor the progress of work, taking each stage separately.
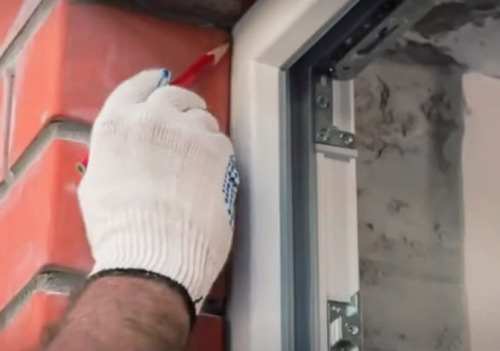
Installation procedure
- Before the installation of the window unit, anchor plates are attached to it: two on the deaf sash, and three on the opening one. To do this, they are clicked into the grooves on the outside of the profile and screwed with self-tapping screws.
- With the frame remove the sashes and glazing units and align it in the opening, then fix it with pads and wedges.
- To the bar, which frames the slope of the window, screwed plates, previously attached to the ends of the frame.
- Spacers are temporarily installed in the openings to prevent deformation of the window unit due to the pressure on it the assembly foam. The timbers are put only under the supporting points (at the edges and in the center, if the unit has a vertical impost).
- With the help of timbers also it is possible to level the window unit in case it was “bent” during transportation.
- When the unit is adjusted, anchor plates are unbent and fastened to walls of an opening with self-tapping screws in diameter of 0.19-0.23 inches (two on each plate). It is mandatory to check the verticality and horizontality of the profiles at each stage with a level and plumb line.
- Installation gaps are filled with foam around the perimeter of the opening, after its drying, temporary pads are removed and their installation sites are also filled with foam. These actions are recommended to perform only after the installation of glass units and sashes in place. Otherwise, the profiles of the window unit may deform.
- As soon as the installation film dries, remove the excess film.
- For tight connection of the window sill, screw self-tapping screws 0.8 inches below the window profile are screwed into the substructure profile.
- Then adjust the position of opening sashes of the window with Allen screws or stars. This stage of installation is very important because even with the correct installation of the unit in the opening, poorly adjusted position of the sashes will lead to a loose fit and from the gap between the sashes and the frame will blow.
- After installation, it is recommended to remove the film from the outside of the window, as it will be more difficult to do in a few months
At this point, the installation of the plastic window in the A-frame house can be considered completed. Then you arrange the external sill, and the inside side is formed and installed window sill.
Conclusion
The popularity of the use of plastic windows in A-frame houses is due not only to a sufficiently high level of comfort and their aesthetic properties, but also the undeniable economic benefit. The installation of PVC windows allows to significantly reduce heat losses and provides significant savings on energy resources.


