This article is for those who dream of building a gazebo for recreation, but for some reason can not implement it. Perhaps you just don’t have enough experience or financial constraints interfere – these can be the simplest reasons. To eliminate them, we will look at how to build a gazebo cheap, a project that 100% guarantees a positive result.

We will save only on wages, that is, we will consider the option of the DIY gazebo. But we will take the materials of good quality so that the construction is reliable, durable and for many years brought only joy.
Choosing where to install the gazebo
First, it is important to choose the right place. It would seem, well, what to think here-build where you want. However, a comfortable stay by and large will depend on the successful placement. In addition to the design it is desirable to consider several other factors:
1. Distance from home. Just like that, there is nothing to do in the gazebo to sit no one will, most often being in it is associated with”active recreation”. Take pity on the Housewives if the gazebo is placed too far from the house – they are guaranteed multi-kilometer runs.
2. the Ability to provide minimal landscaping – bring water and ensure its drainage. Rinse the food, wash your hands-water is always necessary, even a relatively simple gazebo should give maximum pleasure.
3. The opportunity to make a fire, set the grill, barbecue. Open fire obliges you to observe safety measures. It is better to immediately exclude any ignition from an accidental spark, it is desirable to take into account the most frequent direction of the wind, draft.
4. Distance from “prying” eyes. So that the gazebo really had the opportunity to relax, or Vice versa to have fun. Do not place it too close to your neighbors, otherwise, You will always be the center of attention.
Once you have decided on a place, you can immediately prepare it: clear it, provide for the possibility of rainwater drainage. If everything is satisfactory, we proceed to the stage of drawings and calculations.
DIY gazebo plans
You probably want a reliable, long-lasting building. The most reasonable solution is a gazebo made of pipes. However, this option is not suitable without welding skills. Therefore, the wooden version is more accessible for implementation.
Looking at the gazebo plan, you can doubt the simplicity of the design. However, it is worth noting that the version of the gazebo for the description is not chosen in vain – it guarantees the result even for beginners who do not understand anything about construction. For proof let’s look at why everything is so simple:
First, a small amount of tool is required:
1. Household tools: shovels, buckets-found in every yard.
2. Hand tools: hammer, the axe-any owner can find them.
3. Power tools: drill and belt sander.
Second, you need minimal construction skills:
1. Dig
2. Sawing.
3. Pounding.
The most difficult thing, probably, will be to measure the dimensions correctly and tighten the screws. Due to the simplicity of the design, such a construction of a DIY gazebo is possible for everyone. Next, let’s look at the drawings themselves.
The plan shows that the gazebo is recruited in rows. For beginners, this is the main advantage: there are no racks, support pillars. After all, installing them in a vertical position, mounting parts in a common horizontal, ensuring structural strength — the main difficulty for beginners. But in this project, even one person can raise all the details.
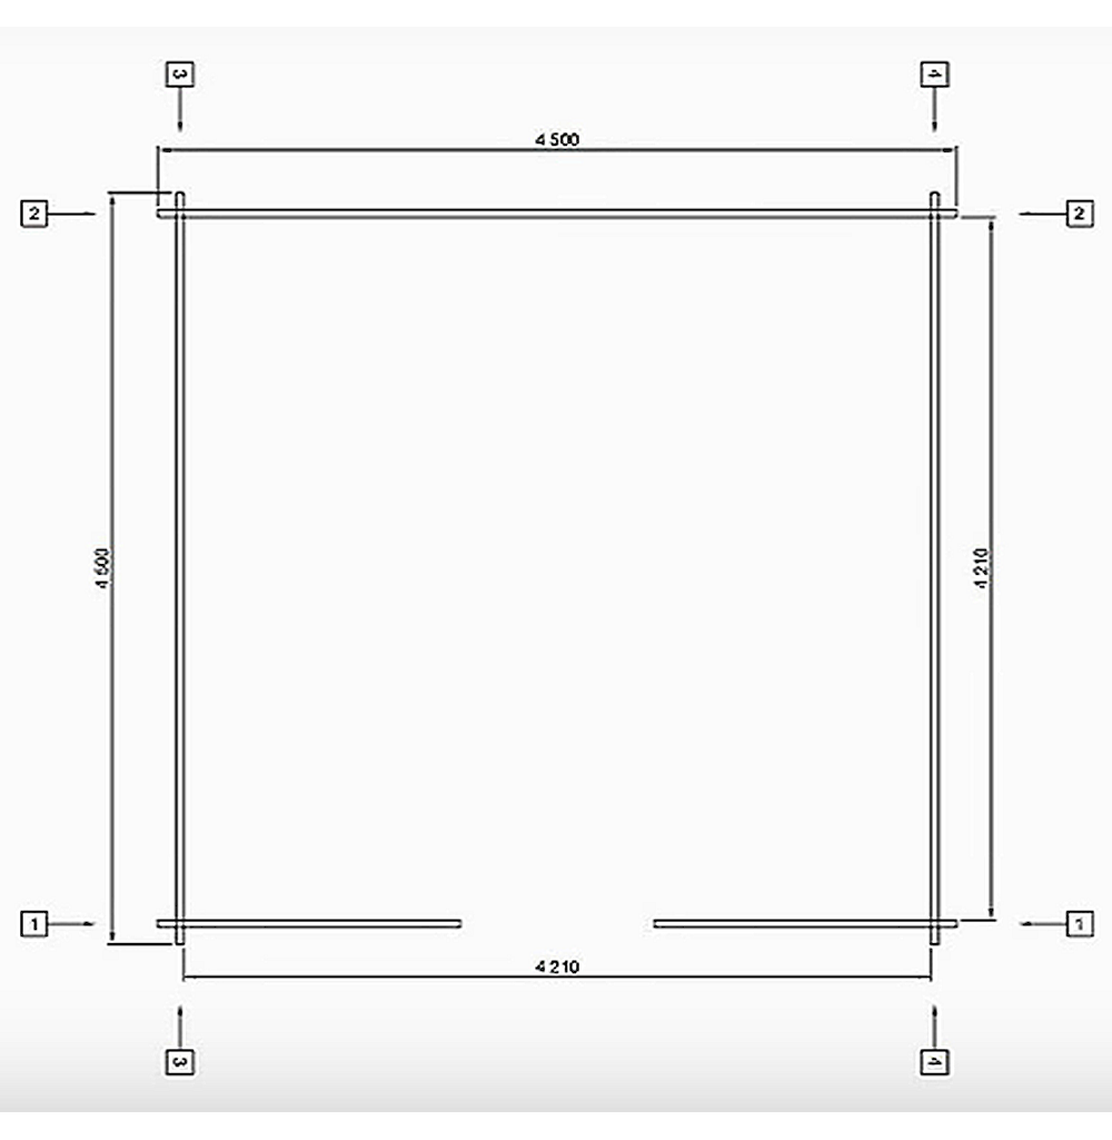
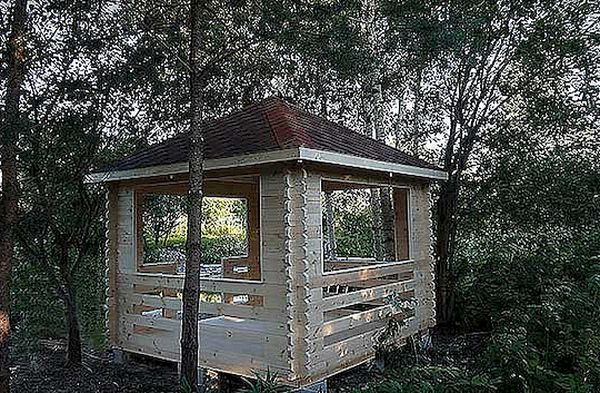
Let’s look at the top view. It shows the overall dimensions – the length of the lumber. You can see that this is a gazebo of 4×4 meters (in the drawing a little more, but this is not very important – any size can be proportionally changed). The gazebo is planned to be square. This is a great advantage since such a marking of the foundation is much easier to do.
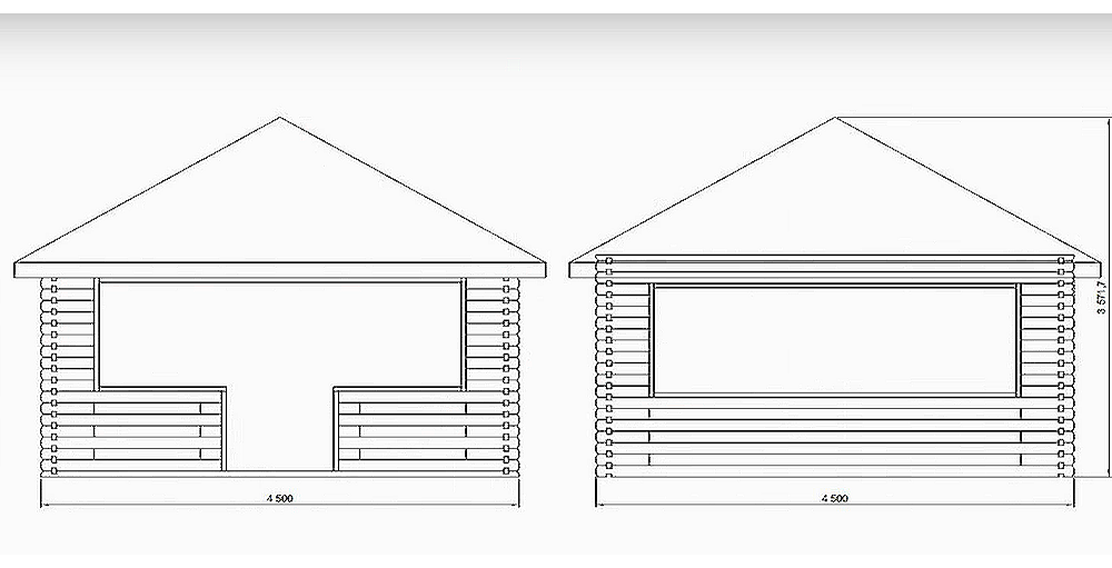
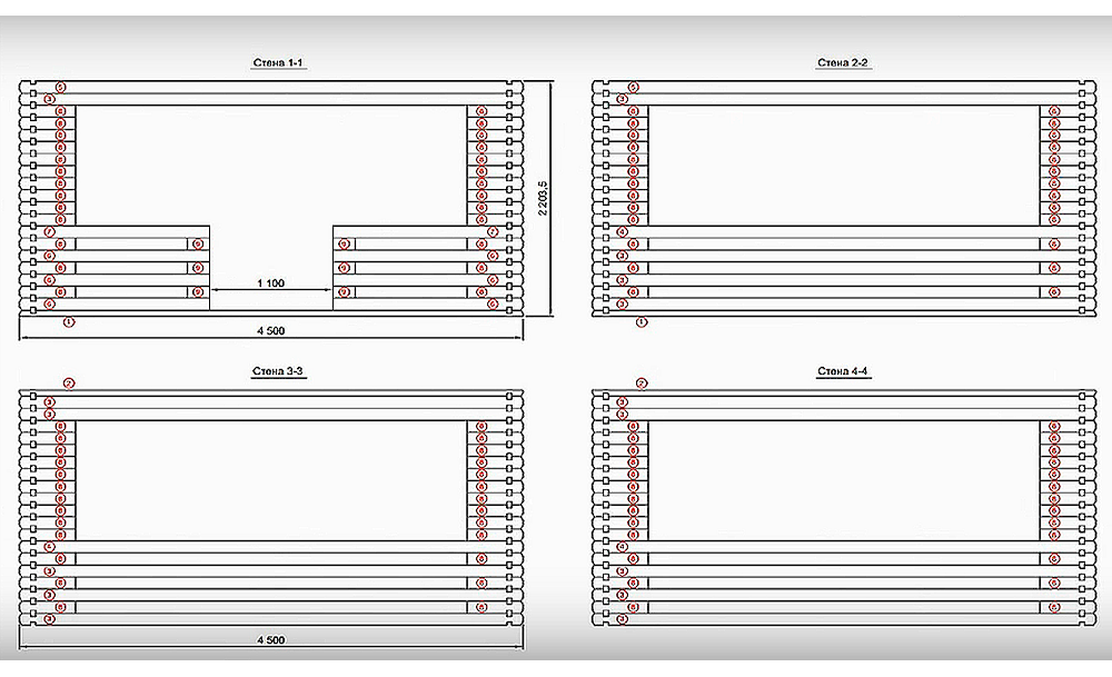
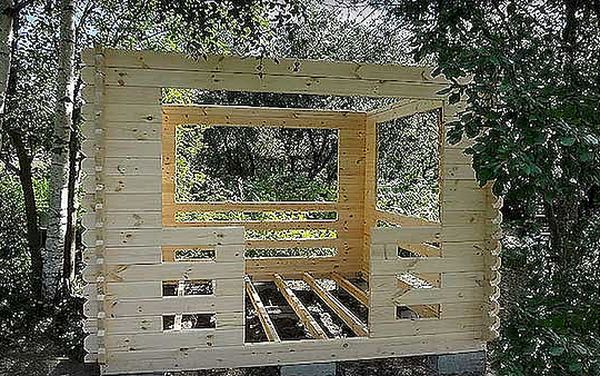
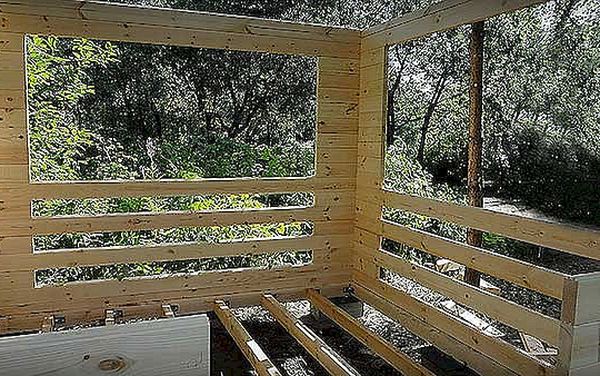
Next is information about the rows of walls. Please note that the lower part of the gazebo is supposed to be “translucent”. This will provide structural strength while saving material – it is easy to calculate how many rows in height can be raised by increasing the illumination. It turns out visually light, a beautiful gazebo, well-ventilated, which is important for “non-capital” buildings.
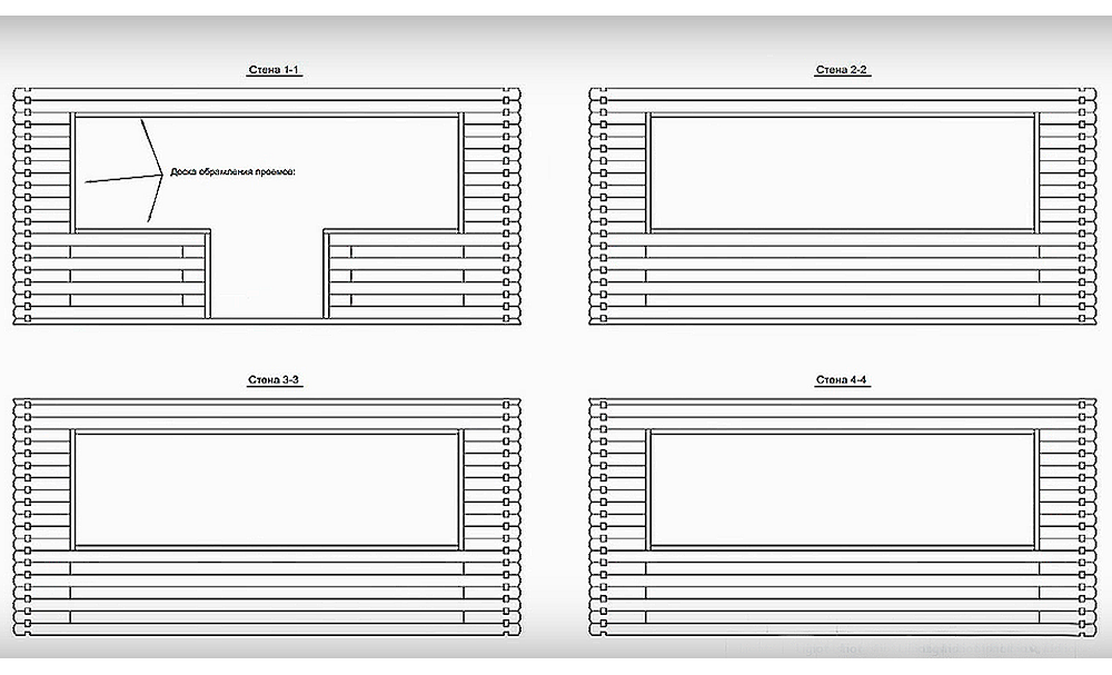
The following image draws attention to the boards framing the openings. Of course, these are the most important elements that increase structural strength. Although, the horizontal parts perform more of a decorative function – it is advisable to perform them and use them as railings. And vertical racks really strengthen the construction, their presence is mandatory. They set and control the verticality of openings.
As lumber, we will use 45×130 mm profiled timber, which is perfect for making small structures-country houses. It is easy to assemble even a structurally more complex hexagonal gazebo. It is available in various cross-section versions, with a different number of tongue-and-groove options. The factory design presupposes a quality guarantee in advance – such products involve a complex, multi-stage technical process: drying, culling, processing on machines. However, the budget will be reasonable.
In the future, we will look at how and with what, if necessary, it can be replaced. Those who want to save money, but spend time should be immediately warned – the material should be already in stock, natural drying.
It is noteworthy that all the elements of the walls are structurally the same and they differ mainly only in length. To connect the corners, they have cutouts – let’s call them bowls.
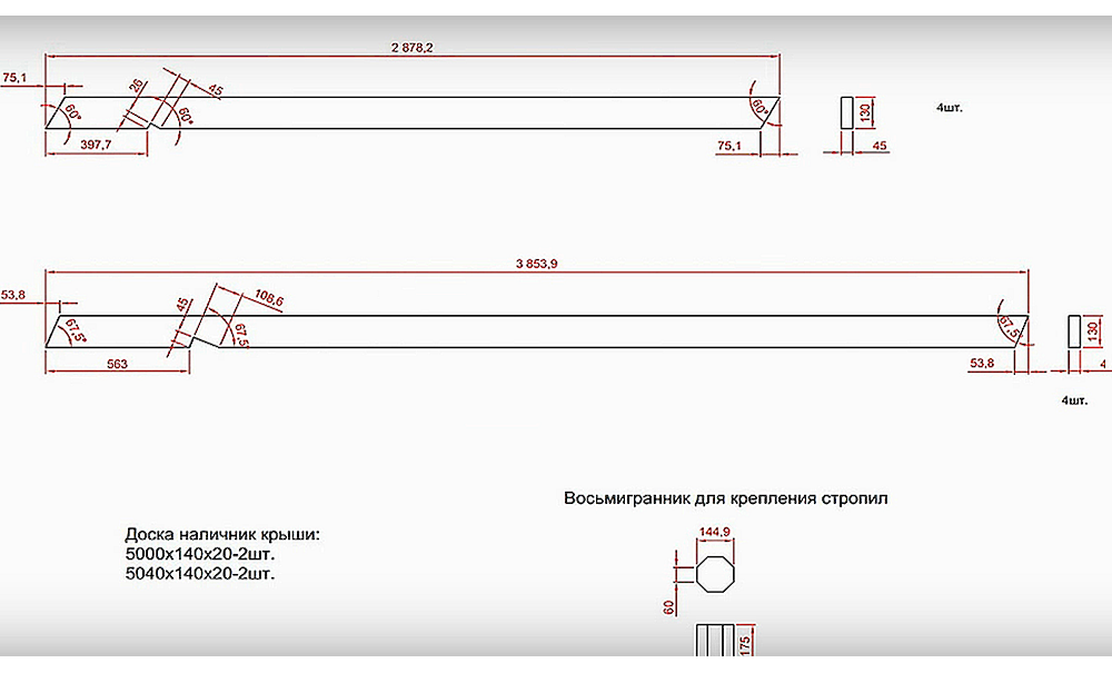
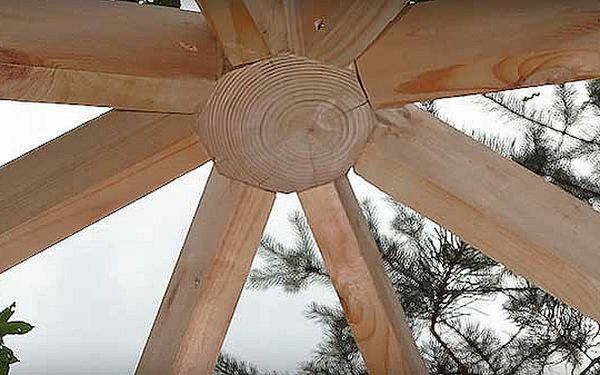
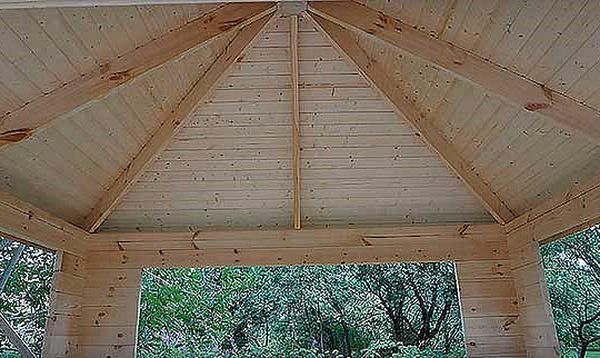
Separately, very detailed and clearly drawn structural elements of the roof: rafters and octagon to connect in the center. As you can see, the number of rafters is 8, but based on the number of walls, it will be a four-pitched gazebo.
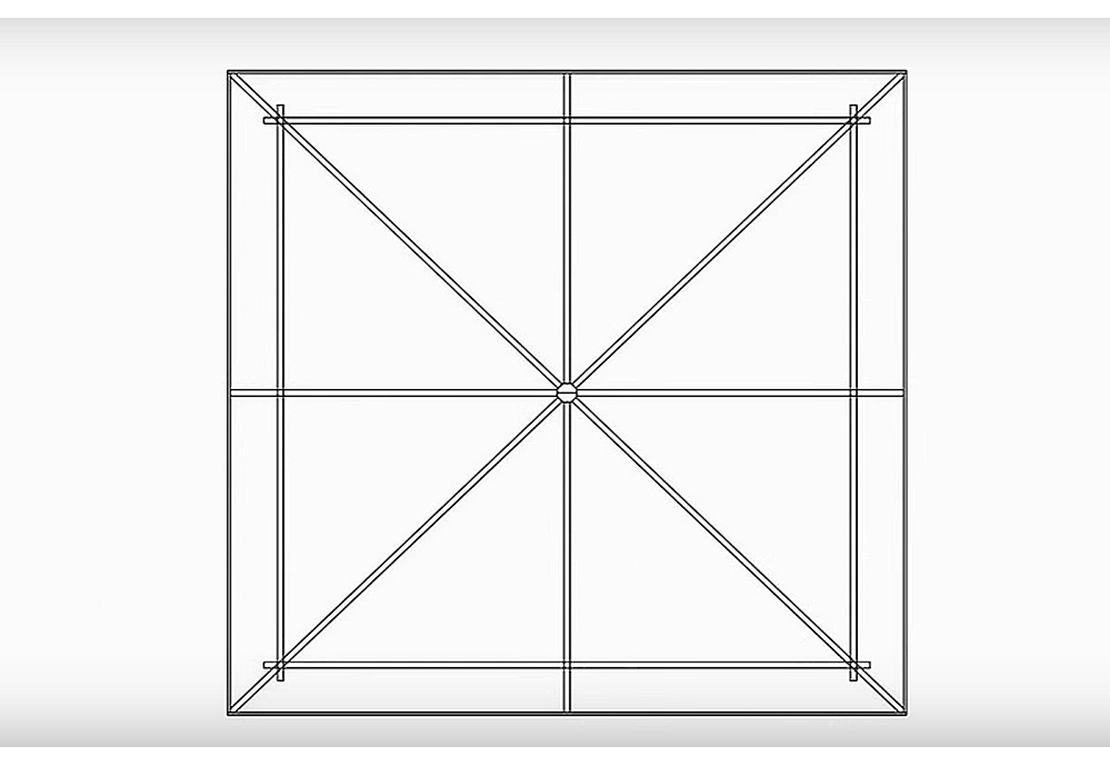
The position of the rafters is also indicated in the top view. The roof itself is a pyramid, based on the corner and intermediate rafters. Now their position is even more clear.
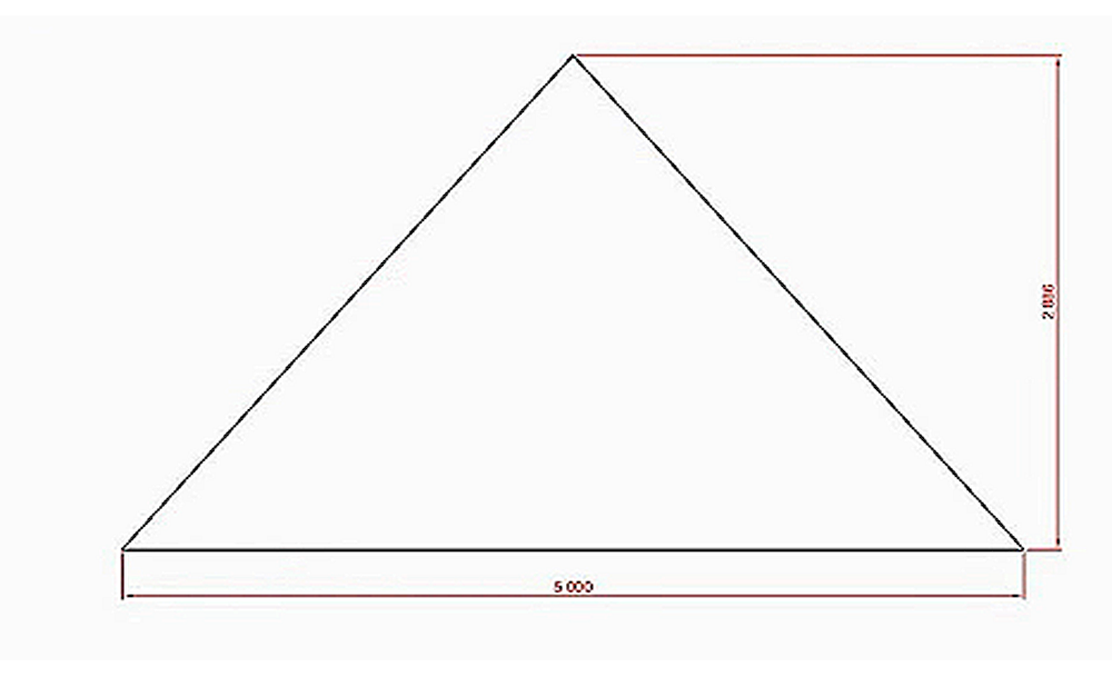
And finally, we give a scan of one roof slope. Looking at it gradually returns the feeling that this is a drawing of a simple gazebo. It is easy and simple to calculate the amount of roofing material for the entire roof.
At the end of the preparation, you can note that drawings and pictures greatly facilitate the preparation and calculation of materials for the construction of the gazebo. Moreover, they can easily be adjusted for existing lumber-recalculate in the direction of decrease or increase. The main thing is not to be lazy to do it on paper, so that after you do not have to look for a “way out”, because we are not going to rebuild the gazebo.
Step-by-step instructions – how to build a gazebo
We start with building the Foundation. It should be thorough because the gazebo is relatively heavy. A columnar Foundation will be quite enough. For greater strength, the piles can be tied with a grillwork. But this is only as a precautionary measure, at your discretion. For example, if the gazebo is built in a low place and you need to lift it off the ground. Or when the lumber is not long enough and a large number of joints are planned.
The foundation, framing, joists
Make a markup. In order not to waste time in vain, you can not install rags – for a small Foundation, it is enough to mark a right angle, check the diagonals and drive wedges into the ground next to the corner piles. They must be of sufficient height to mark the General horizontal for construction. Later, for each pile, you need to make the heads, the height corresponding to the horizontal marking so that the binding on the piles immediately fell into the horizon. Why do you need to drive wedges next to the piles, and not along the axes? So that the markup can always be restored, because we do not build a gazebo in one day, in case of any doubts, you can always check.
If the marking is ready, it’s time to dig or drill holes for piles. The images show rectangular Foundation blocks. The area of their support is relatively large, but the depth of such piles should not be less than the depth of soil freezing. This is important, otherwise, you could just as well have laid the binding through the waterproofing directly on the ground.
The only advantage of the Foundation “on the rocks” – the blowing with the wind. Of course, in the southern regions, this is more than enough, but for places where the winter is long and severe, the piles need to be buried below the depth of soil freezing. It is necessary to maintain an equal depth of occurrence (and it does not matter: on a flat site, slope, or mountain).
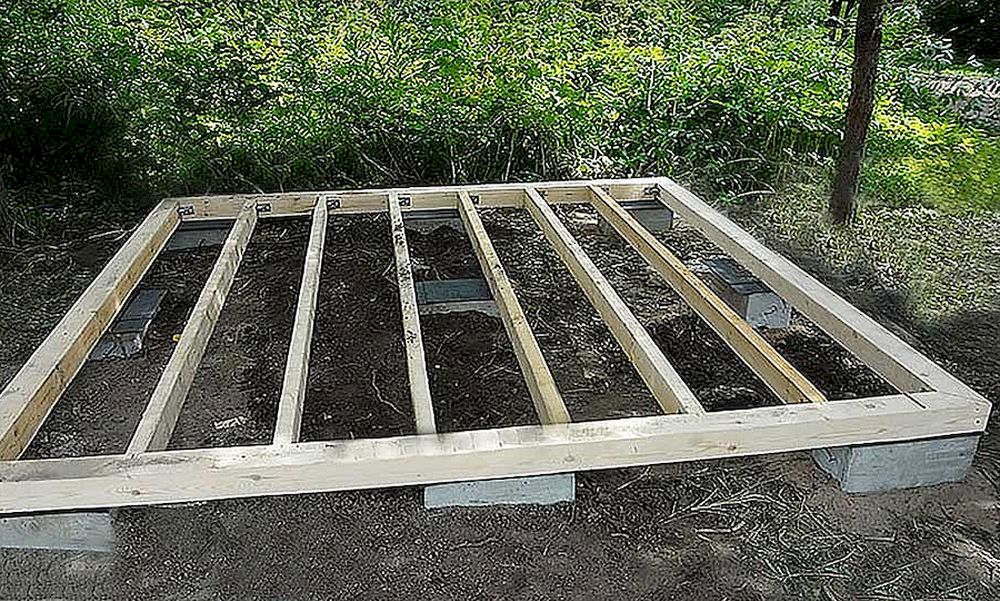
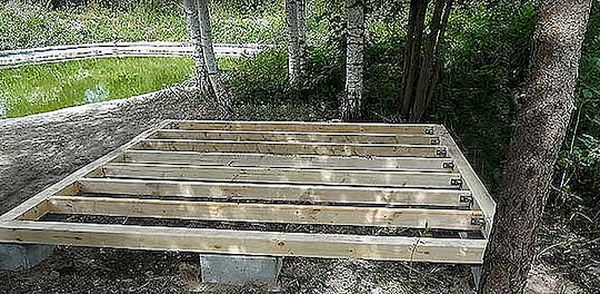
The Bay of the pile, through the waterproofing of roofing material, we lay on them a bar of binding, with a cross-section of 15x15cm. The images show that the ends are filed in 45 deg. and docked in a corner. Of course, it looks spectacular, but it does not give additional strength to the structure, and without skills, it is quite difficult to file such a joint beautifully. For beginners, you can recommend the “half-tree” corner connection. It is easier to execute it and to argue for it – it is stronger. But if you really try, you can cut the corner “in the oblique paw”. The joint looks professional, it can not only be further strengthened but also decorate the gazebo.
Having collected a bar in a square binding we lay logs for a floor. In the images, you can see that they are level with the bar, and are loosened by metal corners. It looks beautiful, and it is even more convenient and reliable to use the appropriate size of the support for the bar – they lag like in notches, but their use only affects the speed of Assembly. However, if you want to save money, this can be done by cutting out the slots for the spike on the logs in the opposite bars of the binding. It is easy to do this, just file the logs a little more than the net size, taking into account the spike on both ends, and perform it also in the “dovetail”, and in the bar to hollow out the grooves for them. It will turn out that the logs will fasten the bar, and in the transverse direction everything will disperse with floorboards – it will turn out really strong.
Moreover, this will give an additional advantage – the number of metal parts – potential sources of condensate that stimulate rotting processes-will be reduced. Plus-everything is easy to disassemble for antiseptic treatment. This is the lower part of the gazebo, all except the outer part of the bar will be hidden by subsequent design elements – so “outside” is immediately desirable to sharpen and sand, otherwise-while only protection. We will also leave the flooring, for convenience, you can throw a temporary shelter and go to the construction of walls.
Gazebo walls
The material for the walls in the image is just perfect, it is a pleasure to work with it, and the question of how to make a simple gazebo becomes rhetorical: after all, the wood itself is dried, the geometry is excellent, the surface is smooth. This is a profiled tongue-and-groove timber with a cross section of 113×45 mm. One problem is the price. But it is worth it, if you can buy it, it is great-a gazebo for giving your own hands will be built quickly, like a mushroom.
Unfortunately, there are often situations when the budget is very limited, but under such circumstances, you inevitably become hoarding, and a stack of boards in the yard – a common thing. If we consider the technology in a simplified version, from the size we can assume that it is made of a Board “fifty” 15 cm wide, which is sharpened from the sides for smoothness, or sanded to 5 mm, and the cutter chose a groove-comb, this just requires a couple of centimeters. In principle, this can be simply repeated if you look at the diagram – the lower rows do not need milling for the entire length. But still, for home performance, this is a huge amount of work. Thus, the gazebo with your own hands will be built for a relatively long time.

However, just by looking at the corners, one can conclude that their design is very successful and even by itself excludes any displacement. If it is reliable, from all sides to strengthen the openings, everything can be made easier – to assemble from a dry edged Board 150×50 mm, additionally fastened with nagels:
1. Select the Board at least visually-the one that is smooth to prepare for long parts, a curve and with large through knots – for short ones.
2. Tear off the size, if there is where to store it can be for the entire gazebo at once – but then it is better to work in several stages as you will be convenient. You do not need to try to completely assemble the walls at once, it is easier and easier to process the boards in parts.
3. You need to give the Board an aesthetic appearance – remove the chamfers and make it smooth: touch it with an electric chopper, adjusting the knives to the minimum cut. Then sand with a belt sander. If there is no electric pipe, you can do with one sander, but you will have to work in two stages: first with an abrasive belt number 40 – it is like a rasp, after the tape number 80-in principle, this treatment is quite enough. It is not recommended to sand with a grinder, because the surface of the Board will clearly show potholes and circular risks from sandpaper.
Then it is almost the same, as for a gazebo made of improvised materials – a self-prepared Board, and for a profiled bar:
1. On the template mark up and cut the corner of the bowl. Please note that they should be slightly cut from the sides.
2. Perform a rough Assembly of several rows. With a profile bar, there will be no problems, and the prepared Board must be assembled on the nogs and make sure of a high-quality fit, if necessary, attach the details to a tight fit.
Then disassembly and painting of the prepared parts separately. This is necessary to avoid unpainted places (they look very untidy). And in general, in the horizontal plane, it is much more convenient to paint, it turns out qualitatively, without streaks, even for beginners. If necessary, first tinted or immediately cut with varnish. However, it should be the understood-the color of toner is desirable two times, from one layer of good color can not be obtained, between them easy manual sanding-remove the pile. After, even before Assembly, a layer of varnish is desirable. In General, this is 3 cycles of painting and drying – the work is not fast.
Here you can save on materials and time – instead of processing the wood with toner, you can simply burn it with a burner or blowtorch – this is simultaneously disinfecting treatment, tinting the wood, replacing the NAP sanding – all in one pass, without the need for drying. Of course, the painted surface looks much better, but it will take much more time.
Important: after seeing the wood-burning procedure, the older generation can suggest that it can be painted with hot drying oil. In principle, once it was successfully practiced as the design of gazebos, wooden fences-cheap, and angry. But practice shows: after 2 years, the tree becomes gray, by 5 years everything will turn black and the former state of the wood will not be returned even by grinding. That is, this should not be done even as a temporary measure – high-quality modern paints and varnishes are much more durable.
In order not to return to the topic of painting – this is all relevant for the elements of the roof, floor, the principle is the same: adjusted – painted – mounted. Practice shows that with this approach, even for beginners, everything looks neat and beautiful. And Vice versa, it would seem that the “Mature” builders when painting after Assembly often show flaws – due to changes in humidity, the tree constantly “plays” in size, exposing unpainted areas, and if they are not painted, then they are not protected from moisture.
The gazebo roof
If a wooden DIY gazebo is built according to the dimensions specified in the drawings, then the production and fitting of the truss system will not cause difficulties. Connecting the rafters at the top through an octagon is a successful solution without unnecessary elements, the principle of fastening is clearly visible in the illustrations. The method is universal, the same principle is used to build a hexagonal gazebo and a roof over it.
It remains to mount wind boards around the perimeter – to decorate the ends of the rafters and fill the crate. The width of the span between the rafters closer to the walls is relatively large – about 2 m. Therefore, in order not to increase the number of rafters, a tongue-and-groove Board was used, as well as an inexpensive clapboard without sampling on the backside. A soft roof is easy to fit and install. Thus, it is quite simple to build the roof of the gazebo with your own hands.
Usually, by this time, even the most beginners gain experience to develop some independent solution, so the roof device is easy to rethink and make it easier – one plane, and you will get a single-pitched gazebo, or with a gable roof. Naturally, by the end of construction, it will not be difficult to fill the floor. If desired, it is easy to install frames with polycarbonate in the openings – you will get a closed gazebo.
After the end of all installation work, without tightening it is necessary to check whether everything is properly screwed, sanded, painted, and eliminate the shortcomings-while everything is “on the ointment”, then you will need to prepare specially. At this point, the question of how to make a gazebo with your own hands can be considered closed.
DIY Gazebo-photos of interesting designs
Of course, this is universal, but not the only solution. It is very rare to find exactly the same garden gazebos. On the contrary, their diversity is striking. Looking at photos of ready-made structures, you can endlessly wonder at the skill and resourcefulness of the masters.

Gazebo with roof terrace
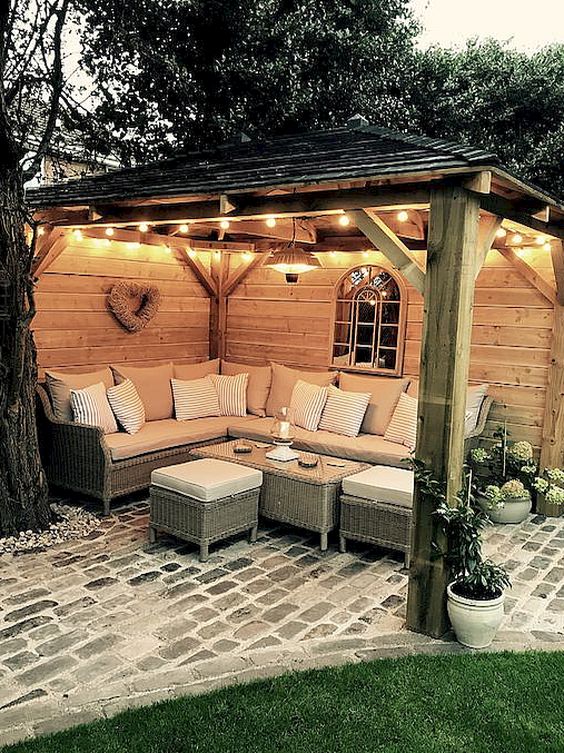
Cozy outdoor gazebo-for summer evenings
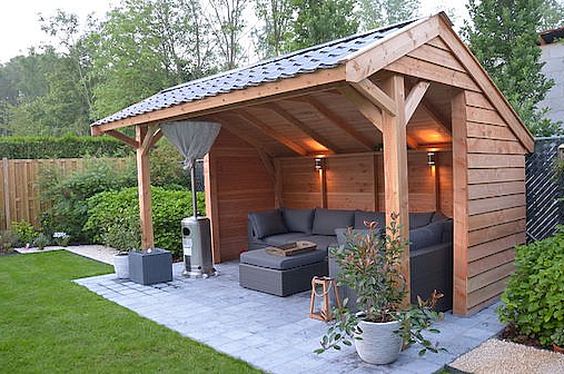
Another version of the open gazebo
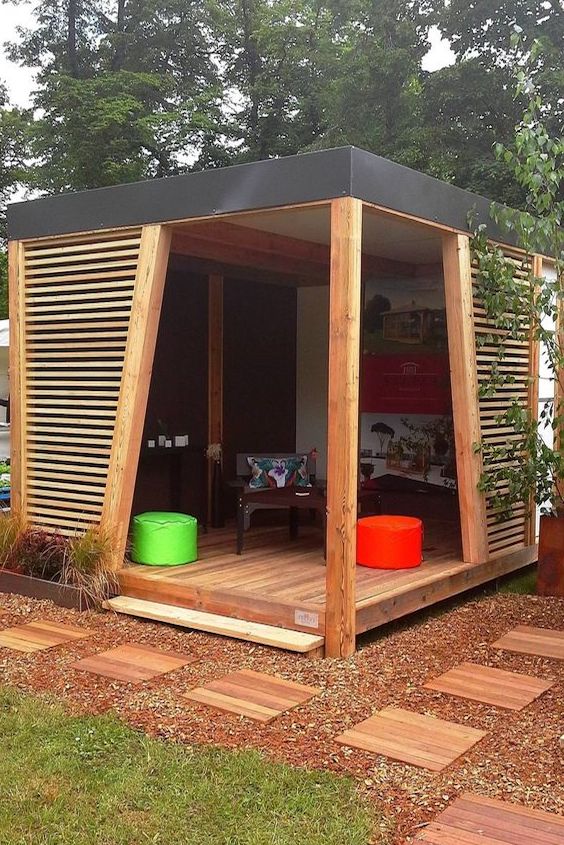
An interesting version of the design – with the walls of ” blinds”
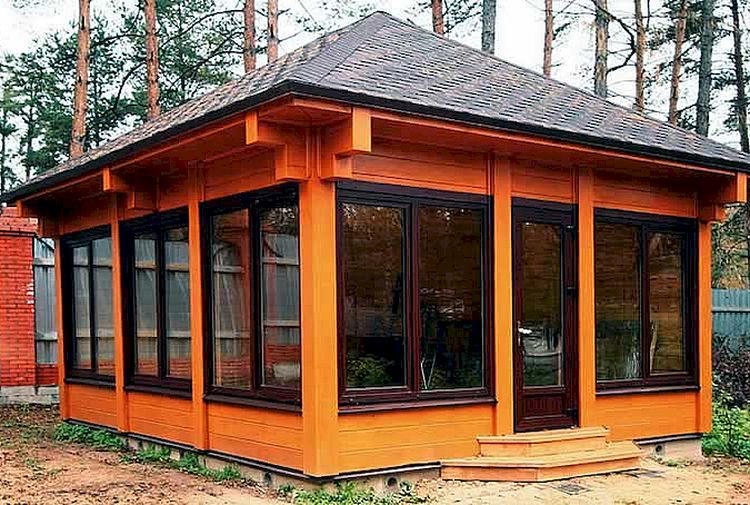
Glassed-in gazebo
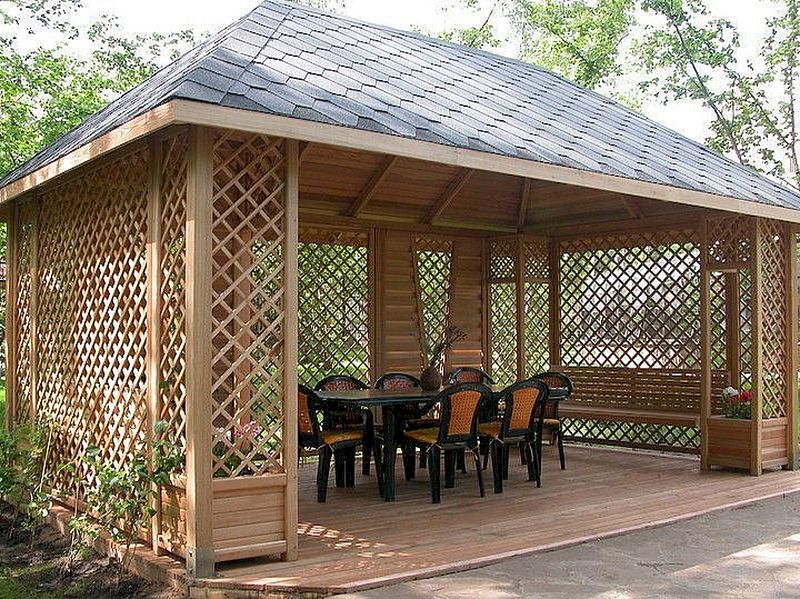
Pleasant gazebo with mesh walls
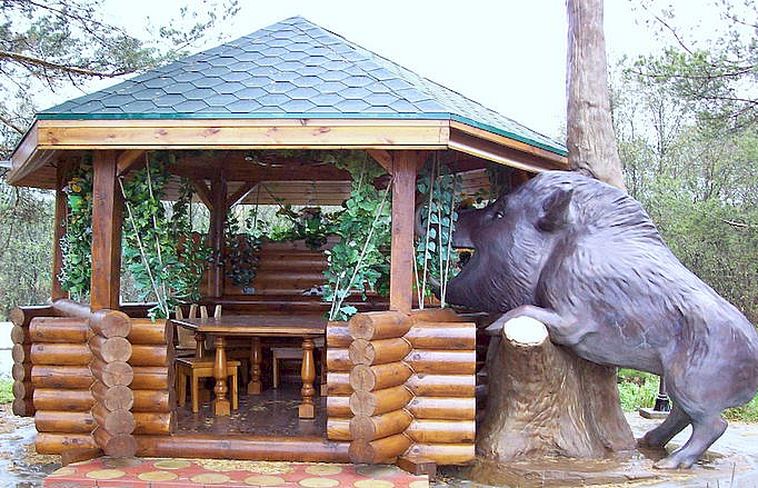
An unusual gazebo of a real master
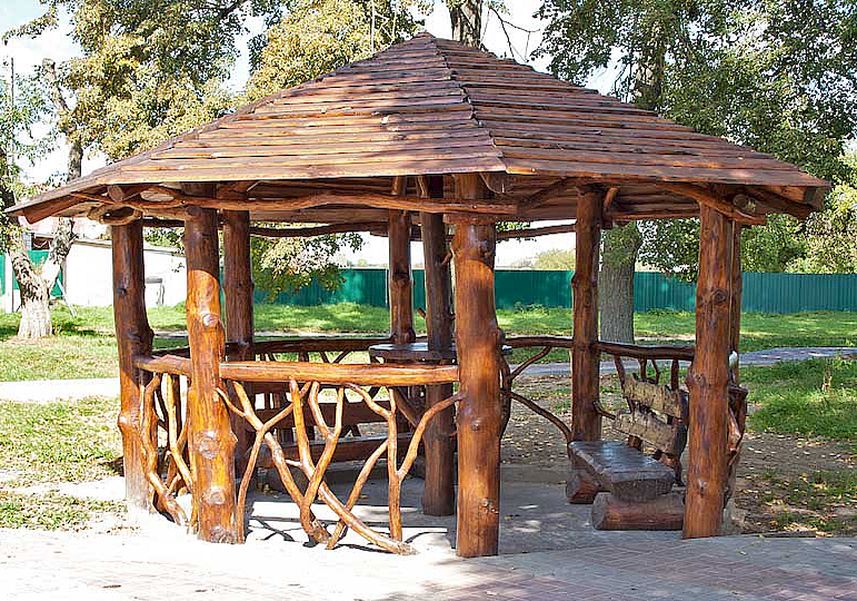
A beautiful gazebo made of branches
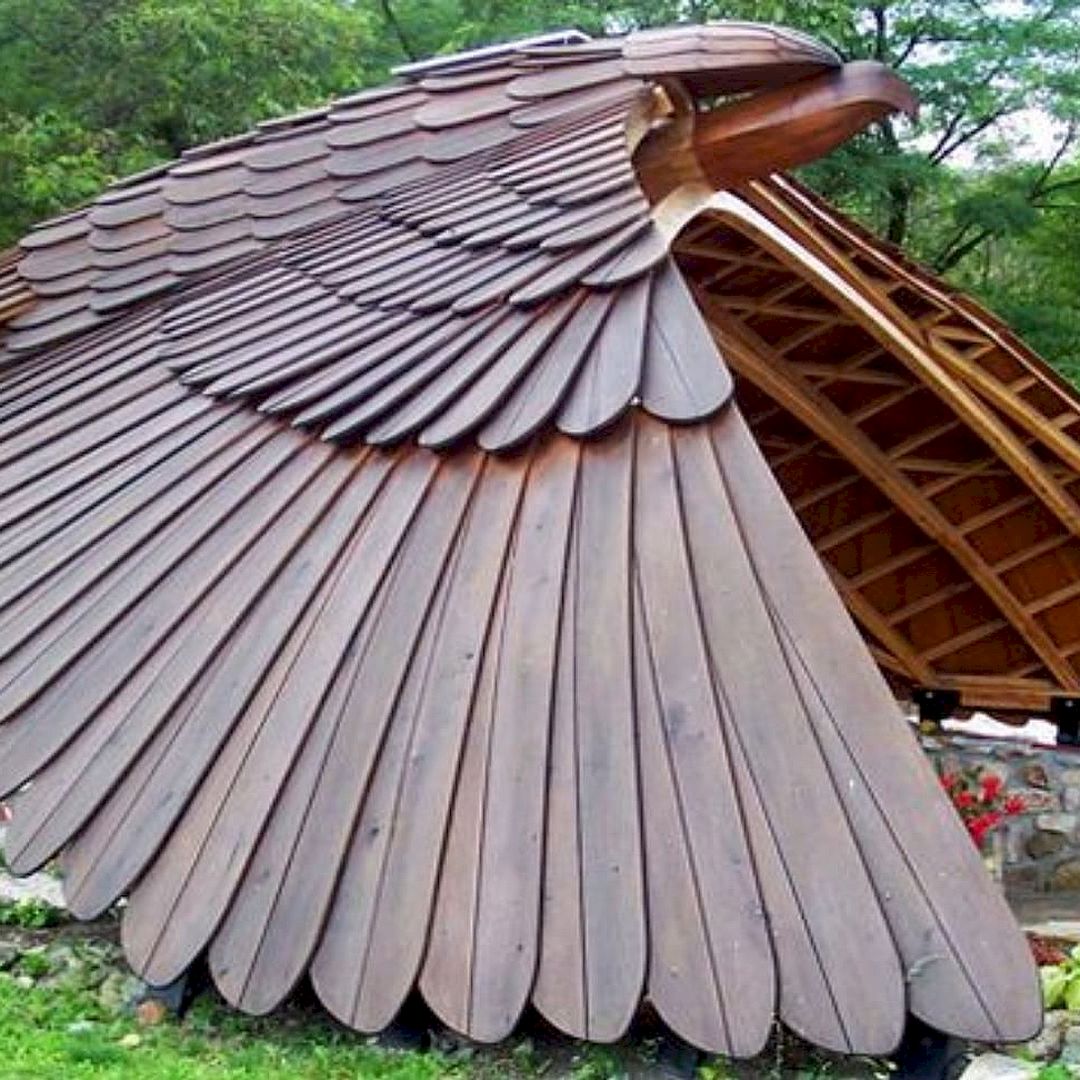
The roof of the gazebo, made in the form of a bird-a masterpiece!


