Repair the ceiling after a leak with your own hands: what to fix after water damage. How to paint, leak repair, how to patch a leak on the ceiling – let’s look at it all in our new article.
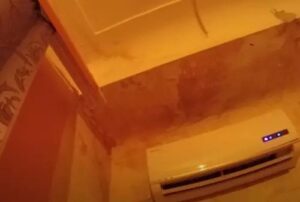
And then it happens – you come home and there is water leaking from the ceiling. This usually happens in two cases: it’s raining outside and your roof is leaking, or the upstairs neighbors forgot to turn off the faucet, or they have a burst pipe. The purpose of our article is to help you with the repair of a damaged ceiling.
Tools and building materials needed
Proceeding to eliminate the negative consequences arising after the water pouring from the ceiling slab, you need to protect the walls and furniture, as well as to ensure personal safety.
When starting to eliminate the negative consequences arising after the water pouring from the ceiling slab, it is necessary to protect the walls and furniture, as well as to ensure personal safety.
Before carrying out with your own hands the repair of the ceiling after a leak, prepare all the devices, tools and required materials:
- different sizes of brushes round and flute;
- two rollers on long handles – fluffy and spongy;
- trowels with hard and bendable blades;
- metal brush;
- hole punch;
- angle grinder;
- a drill with a nozzle designed for preparing mortars;
- assembly gun;
- sandpaper;
- level with a length of 100 centimeters;
- trowel;
- vacuum cleaner;
- containers and tubs for paints, primers, fillers;
- sprayer;
- several buckets, preferably plastic;
- a stepladder and a ladder;
- a high sturdy table.
Repair work always gives off noxious substances. Dust and rust have the most adverse effect on people’s respiratory and visual health. Toxic components emitted when working with paints, putty, stain removers are bad for the liver, especially when you are in an unventilated room.
For this reason, before you treat the ceiling after a leak, you need to take measures to ensure your own safety and thereby avoid long-term treatment and unnecessary spending money.
There is a list of remedies to protect the human body during the repair process:
- goggles;
- a respirator, in this case masks and gauze bandages are not suitable;
- headgear;
- rubber and cloth gloves;
- Clothing made of thick fabric that covers the body completely.
To preserve furnishings, they are removed from the room or apartment for the duration of the repair. If it is not possible to remove all unnecessary, the furniture is covered with several layers of solid polyethylene film. Also it covers the floor and walls. As for consumables, their list will vary depending on the financial capabilities and type of repair work.
For example, before you can paint the ceiling after a leak, you need to buy paint at the rate of 0.05 gallons per square foot. You’ll also need putty, which costs 0.2 pound or more per square foot. Add to these materials a product that protects the ceiling surface from rust and fungus.
The calculation of materials for the repair of different types of ceiling structures – stretch, tile, plasterboard perform individually for each case, depending on the amount of damage.
Fixing the damage caused by a leak
First it is necessary to find out the cause of leaks – it could be damaged pipes or the neighbors living upstairs in the apartment. It is necessary to be careful with electrical wiring.
If there is a lot of water near the ceiling chandelier, it is necessary to inform the electricians in order to prevent a short circuit. First of all, turn off all electrical appliances and, if possible, de-energize the apartment.
When a leak is detected, you should act as quickly as possible. If you do not eliminate the consequences within two days, mold and damp smell can appear. The mold should be removed and a cleaning company should be called in.
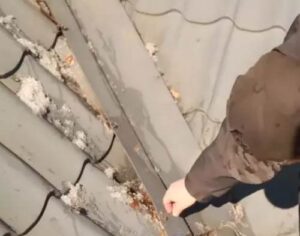
If there are panels on the ceiling, they should be removed, wiped down and dried in the sun. All surfaces must become dry and clean. Drying as quickly as possible to prevent the spread of fungus and mold. This can be done in the shortest time possible by using a construction hair dryer.
When stains are minor and have only just appeared, an ordinary hair dryer is suitable. Also, fans and air conditioners with warm air are used for drying. It is necessary to open windows to allow air circulation. Allocate at least a day to dry.
If the waterlogging affected flooring, it is removed and removed to dry, and soaked elements to be replaced. In an apartment, in which the insulation is made by sheets of gypsum board, carefully inspect the walls. If the drywall gets wet, it must be removed and replaced with new ones.
Before the overhaul of the ceiling after a leak, you should remove all items that should not be affected by moisture.
How to remove stains after flooding?
If you have once again been flooded by unconscious neighbors, or there is a leak in the ceiling of an old water pipe, you will once again see yellow stains on the ceiling. How to get rid of them quickly and permanently? Many people simply advise to whitewash or paint the damaged area anew. This option will really save your time, but it is unlikely to help eliminate yellowing forever. It will come back after a while.
Stains on the ceiling after flooding are removed as follows:
- First remove the top layers of whitewash or paint. It is better to wash off the whitewash;
- After the leaking yellow stain is discolored. To do this, use a solution of whitewash and a sponge;
- The solution is applied with a sponge to the yellow spot and wiped until it turns white;
- At the end, the discolored place is dried, primed and whitewashed again.
Cleaning the ceiling and preparing for finishing
After the completion of drying and elimination of the consequences that arose as a result of the leak, proceed to mopping, preparing special tools for working with a wet surface. All existing stains and streaks are mopped up by treating the leaks with a disinfectant solution.
The fact is that the water that has overcome the floor slabs contains many harmful microorganisms and pathogenic bacteria that contribute to health problems. If you do not make a sweep quickly, it will be more difficult to get rid of the mold and mildew that has spread.
Preparation for finishing the ceiling surface is done in stages:
- Scrubbing the previous layer . With an area affected by moisture, scrape off the old layer of paint, putty and plaster, using a spatula with a hard blade, sandpaper, chisel. If overhaul is not planned, it is not necessary to scrape the entire ceiling surface. It is enough only to clean up the spots with the paint that came off. Then the dust is removed from the ceiling with a vacuum cleaner and a rag.
- Fixing. Next, performing repairs of the ceiling after flooding, the places of leakage are treated with antifungal compositions. To prevent the development of corrosion, apply a solution to eliminate rust throughout the ceiling plane, corners and seams, applying it with flechette brushes.
Stains after painting
If after a fresh repair you notice a layer of putty or paint delamination from the surface, then most likely the technology of painting was violated. That’s why incompatible materials peel off each other. Stains from paint also appear when volumetric decorative plaster is used. If it is unevenly colored or applied in a thin layer, then the lower layer of the surface comes through. Removing stains from the ceiling in this case should be carried out on hot traces, as long as the necessary materials remain after repair.
Finishing the ceiling
When the repair of water-damaged ceiling is completed and the consequences are eliminated, the ceiling is dried, cleaned and treated, proceed to the next type of work – finishing, which consists of several stages:
- Puttying the damaged places. Putty is mixed with water in the proportion of 1:3. Apply it to the damaged areas, level the seams, seal the cracks and fractures. The layer should be even, at the level of the previous primer. Putty dries for a long time, about 2-3 days. After applying the solution, close all the windows in the apartment and leave the coating to dry. The next day, open the windows and thus lower the level of humidity in the room. After drying the ceiling inspected for stains and defects. Any stains are removed with a brush, and defects are corrected with a coat of primer.
- Re-applying putty. Another layer of putty is applied to the ceiling surface and dried for several days.
- Painting. The best choice when repairing the ceiling is water-based paint. Its consumption will be 0.7 oz per square ft. Acrylic water emulsion paint can be easily washed off with soap, it dries in a few hours and does not have a pungent smell. Pour a small amount of paint in a tray and lightly dampen a roller in it. Slowly spend it on the surface of the ceiling. Strips of paint are superimposed parallel to each other. As the roller dries, it is pressed harder. The paint dries for 5-7 hours. Windows are closed when leaving the house so a draft will not damage the painted surface. The room is better to darken, covering the windows with sheets of paper. After the first layer dries, apply a second coat.
Removing stains from plastered surfaces
Painted or whitewashed ceilings are treated as follows:
- mark the damaged area with a circle or a rectangle;
- Using a spatula, remove the plaster all the way down to the concrete slab layer by layer;
- having completely cleaned the stained surface, the concrete is painted over with a layer of nitrolac or nitro paint, which creates a greaseproof film after drying and blocks new stains;
- After drying, the paint is coated with a primer and also let dry;
- The completely cleaned and primed place is puttyed and painted in the main color of the surface.
Peculiarities of stretch ceilings repair
Stretch ceiling systems suffer the least from the influence of moisture. In case of flooding, they will not require complex repairs. The film stretched on the ceiling construction can withstand the pressure of 100 liters of liquid per one meter square. Before you fix a leak on the ceiling, you need to stop the flow of water as quickly as possible and invite a master.
Without possessing the appropriate skills yourself to drain the liquid from the ceiling surface and make repairs should not be made.
To facilitate the repair of a leaky ceiling, the owners of the apartment can do the following:
- Eliminate the inflow of water.
- Remove all furniture and appliances from the room and lay a film on the floor.
- Prepare several deep containers. When there is too much water, the neighbors’ help in draining the liquid will not be superfluous.
Do not puncture the surface to remove the result of flooding, as this can damage the film, which will then have to be replaced entirely. After draining the liquid, all that remains is to dry it. Eventually, the material will take on its former size and shape and should be reinstalled.
Restoring drywall ceilings
Plasterboard refers to materials that do not tolerate high humidity. The complexity of the process associated with how to seal the leak on the ceiling, in this case lies in the fact that to determine the place where it occurred, you can only after the deformation of gypsum board.
Immediately after the flooding perform the following actions:
- If there are wet spots on the surface, you should cut out this area, so that the water does not collect under the ceiling and further does not spread.
- A flashlight and a mirror are brought to the formed hole to assess the degree of presence of the liquid.
- You can tap on possible leaks. If the sound is muffled instead of resounding, the area is removed.
Repair of the ceiling made of gypsum plasterboard after a leak is not particularly difficult:
- The areas affected by moisture, or completely unusable sheet is dismantled.
- New pieces of drywall cut to size and inserted so that they fit tightly, using a painting knife.
- Joints are puttying.
- The surface is smoothed with sandpaper.
- Painting is performed in the usual manner. Several layers of paint are applied to the entire surface and inspect the ceiling coating for defects and irregularities.
So, now you know how to repair the ceiling with your own hands. Let us emphasize in conclusion the following points:
- The easiest, most affordable and effective type of repair of a good base ceiling in dry rooms – cladding with gypsum plasterboard.
- When preparing the base ceiling for any false ceiling, there is no need to plaster it, this will only increase costs and complicate the work.
- For “wooden” ceilings (country style interior design, anti-urbanism, etc.) the best way – cladding boards with laminate on a wooden or metal overhead grid.
- Covering the ceiling with tile materials is not recommended: ways to reliably fasten the tiles on the weight without damaging their front side is unknown.
Tile ceiling repair
To restore the surface of tiles is enough to remove the damaged elements, dry them and return them to their place or replace them with new products. The advantage of a tiled surface is its resistance to moisture. Polyvinylchloride panels also tolerate humidity well.
If they are made of wood, consider a few nuances:
- When the wood has absorbed moisture, it softens and care should be taken when removing the products.
- Do not use blow dryers or heaters when drying wood panels, or they will crack.
Conclusion
If water has damaged your ceiling, repairs will depend on many factors. In particular, the material that was used for the ceiling and what material you are going to use in the repair are particularly important. We recommend that you enlist the help of a construction crew to get everything done correctly and properly. If you want to fix the ceiling yourself, then do not forget to consult with experts from among your friends – useful tips and ideas can save you money, time and nerves.

