Stretch ceiling systems have become extremely popular during recent decades. More and more homeowners prefer a stretch ceiling for their premise because of its brilliant look, as well as its sound insulation quality. This stretch ceiling DIY article will help to mount the system with your own hands in a correct way.
You will need:
- a puncher,
- a ladder,
- a gas cylinder,
- a heat gun,
- a laser level,
- dowels,
- a hammer,
- a screwdriver,
- a scapula,
- a sharp knife.
Choosing materials and implements
But the most important thing is the stretch ceiling material. Before you start looking for a stretch ceiling you’d like, you need to make room measurements – the perimeter, the ceiling area. You’ll also need baguettes or fixing profile – these are aluminum or plastic profile bars, on which the film membrane will be stretched. It should be noted, that aluminum is more durable and reliable, while plastic is cheaper. All the materials should correspond with the perimeter of your room, taking into account water pipes or heating pipes. It’s better to buy a little more, than a little less, for sure. You should also buy enough dowels or screws. The more often they are pierced, the stronger the profile will be.
The most popular types of stretch ceilings are:
- PVC stretch ceiling system,
- Vinyl stretch ceiling system,
- Fabric stretch ceiling system.


Dealing with a fabric ceiling, you won’t need a heat gun and a gas cylinder. Perhaps, some noise-proof materials may be useful, if noisy neighbors live above. Great options – fine slabs of mineral wool. The sound insulation material is fixed to the base ceiling by means of screws and held by stretched synthetic ropes. Ropes are needed to extend the life of the insulation, as it eventually cracks and may even fall.
Types of installation
PVC and vinyl stretch ceilings can be mounted with the following methods:
- glacial method,
- wedge method,
- harpoon method.
The harpoon type of installation is considered the most reliable. But some additional implements must be ordered from manufacturing companies, since special high-frequency machines are used for producing welding films and harpoons of high frequency. If it’s too expensive, we recommend using a glazing or wedge method.
Fabric ceilings are usually impregnated with polystyrene, so its installation never causes problems.
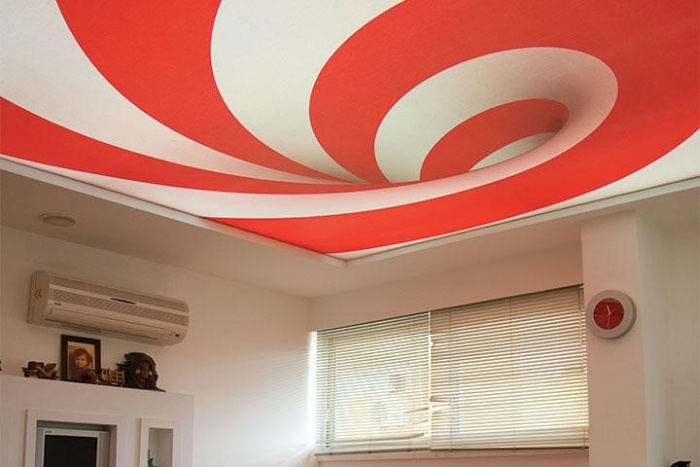
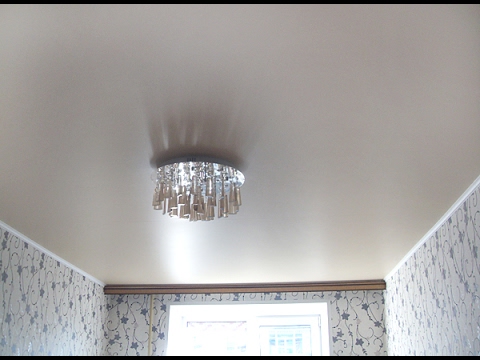
The construction market now offers a wide range of stretch ceiling models – both in quality, color, and value. Cheapness is the most dangerous aspect while dealing with choosing of a stretch ceiling – cheaper profiles can seriously damage your health. While buying, don’t hesitate to ask the seller to check it for defects. The choice of colors will depend on your preferences and the style in which it’s supposed to perform the entire interior of the room. The white color of the ceiling is universal and can visually make the room higher. If you are bored with white, you may choose photographic printing, vinyl stickers or art painting.
Preparation works
Before the installation of a stretch ceiling, you have to strain and perform all the rough work. All the furniture must be put away, as it may be harmed by the increased temperature from a heat gun. It’s necessary to level the walls, plaster them or cover them with gypsum boards, depending on your design intentions. Make sure that the corners are straight, not rounded. This will allow you to measure the perimeter of the room more accurately and facilitate the installation process itself. If there are interlace stitches, they should be cleared, poured with mounting foam and well sealed. Ceiling overlap also must be cleaned from the old finishing material and covered with a soil mixture protecting the ceiling from mold and fungi. The presence of the old finishing of the ceiling is very dangerous – the pieces of it may fall off and stay inside the stretch ceiling. This will greatly spoil the appearance of the tension system. Don’t forget to perform the installation of electrical wiring under a stretch ceiling, in order not to have problems while installing lamps or chandeliers.
Installing PVC and vinyl stretch ceiling
The order of operations in such a delicate business like the installation of a stretch ceiling is very important. The following steps describe the technology of the ceiling installation in details.
The first stage is the marking of the walls. You should measure the height of the walls in all four corners and apply marks to it. Unfortunately, the walls in many apartment buildings are quite far from perfection and sometimes the difference in angles can reach up to 2 inches or more. The layout should be done taking into account the fact where the chandelier or any additional lighting will be placed. Using a laser level you should apply a line along the perimeter of the room where the baguette will be fastened. The line should be perfectly flat.
Then you may proceed to the second stage of the work – the installation of the profile to the walls. Orienting to the finished line, fix the profile to the wall using screws or dowels, keeping the step between them no more than 3 inches. To make it easier and for the profile not to move during work, it may first be glued. Ensure that the dowels don’t come too close to the edge – keep some distance. Proper installation of the profile is the key to the successful installation of the stretch ceiling system.
The next stage is the installation of the panel itself. To perform the installation of PVC ceiling and evenly stretch the panels in a proper way, it’s necessary to warm the room with a heat gun. This step can’t be skipped – so you must buy this equipment even if you are no longer going perform the installation of stretch ceilings in your life. The gun is useful for heating a garage or a room in the winter. You can also lend it from friends or rent it. Begin installing only when the temperature in the room reaches 105 °F. It’s hot, of course, but for the sake of having things done brilliantly it’s necessary to suffer a bit.
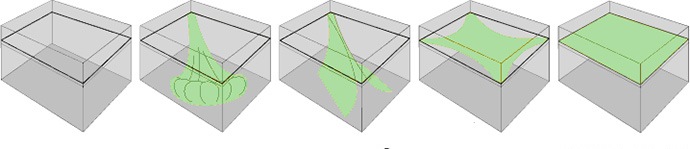
It’s important to follow a certain sequence of film mounting. The material is taken from the package with clean hands, then it’s place it on a clean floor. Clean floor means not having some construction debris, screws, metal stuff on it! Then the panel is attached first to the corners diagonally – it’s fixed to the base corner, then to the opposite one – diagonally. Don’t forget to warm it up with a heat gun. By the way, each installation leaflet is accompanied by an installation manual that will make it easier for you to understand the process. Then you should fasten the corners. Use special clips with a lining – it’s necessary to protect the panel from damage. Gradually warming the film, it’s necessary to remove the clamp, which is located in the groove of the sheath of the tension web, then slowly insert the panel into the baguette.
While proceeding to another segment of the material, the previous one is slightly held by the hand, in order it not to ‘jump out’ of the profile. It’s necessary to hold it until at least two locks on both sides are fixed. Then you should fasten the rest of the corners. Keep in mind that getting started is easier than finishing – the closer you get to the end of the work, the harder it will be to fix the corners. In this case, the helpers are needed.
After fixing the corners, you may proceed to fix the film on the walls along straight lines. For these purposes, a straight blade designed specially for stretch ceilings is quite useful. Where there is a seam on the panel, this area is fixed to 2-3 locks. Then the distance between the corners is divided into two parts being fixed to several locks. Then the remaining sections are also divided into equal parts. In general, the process of fastening is very much like hanging curtains to the cornice, because you perform similar actions – start near the edges, then in the middle and the rest is divided in equal parts.

During the process of fastening it’s necessary to perform the constant monitoring in order not to have distortions and wrinkles. The main thing is to notice a possible oversight in time – it can still be eliminated at the stage of installation. If the folds become noticeable a bit later, they can be smoothed out with the help of a heat gun just by warming the problematic segment.
At the very end of the installation it’s necessary to install the fixtures on pre-prepared seats on special racks. They will be easy to find after installing the panels. Make holes gently, exactly where it’s necessary. Do it very carefully, slowly, otherwise all the work will go wrong. The final stroke of work is the installation of the cap of the stretch ceiling. This is a special masking tape, which is installed in the technological gap formed between the ceiling and the wall due to the thickness of the profile. During the stage of choosing the material one should take care of the color of such a tape – it should correspond with a color palette of the whole room. It’s very easy to install – drown it in the gap and pressed it down with fingers.
If you don’t want to make a stub, you may think of a plush wide plinth. The installation of the skirting board has its drawbacks and advantages. If the skirting boards are glued to the wallpaper, then you will then have to adjust the paper webs tightly to the edge of the ceiling. If you do this in a careless way, you can damage the ceiling. Cut the excess paper with a sharp knife.
Installing stretch fabric ceiling
The installation of seamless fabric stretch ceilings differs a bit. The main difference is that you don’t need a heat gun. Two-level fabric stretch ceilings are very trendy today. The combination of two types of ceilings gives unlimited freedom of imagination. First, you need to perform the installation of the box under the stretch ceiling. The box can be all kinds of shapes – geometric, fantasy, just edging around the perimeter – any of them. The installed gypsum board structure is first plastered, then painted in the desired color, and then all the steps described above are performed – fixing of the profile, etc. The huge advantage of a two-level ceiling is that you can make the most unusual lighting in the room, without violating the integrity of the film.
Security measures: tips from the pros
When installing stretch ceilings, a heat gun and a gas cylinder are used. This equipment represents an increased danger. Therefore, in order to avoid explosion, all safety precautions should be followed. Use only those gas cylinders whose service life has not come out yet. Carefully check the date of its production and the expiry date. Remember, that refilling of the cylinder is made at a specialized station only! There it will be checked for validity and filled in a strict accordance to its weight. A defective gas gun can’t be used, too. It’s necessary to check the integrity of the hose, the connection of the hose to the cylinder and the gun before the work, to ensure that there is no gas leakage;
The proper care of stretch ceilings
Stretch ceilings can’t stand dealing with:
- Mechanical impact
The fabric material has higher strength characteristics than the film material. However, both types of ceilings are not recommended for cleaning with hard brushes, rough fabrics and abrasives. It’s also not possible to strongly press on the panels to avoid deformation.
- Temperature differences
Under the influence of high temperature, the film coating may deform.
- Chemical impact
You shouldn’t use acids or acetone-containing formulations – they can cause spots on the coating.
Since modern materials have an antistatic effect, dust particularly doesn’t settle on them. But if it does, you can try to wash it off with a slightly damp rag. Then it can be wiped with a usual dry soft cloth. Possible stains, drops, splashes are removed if necessary using modern cleaning formulations. Don’t use powdered products or the ones having aggressive ingredients. They can scratch the surface or blur the color – it may lead to deformation of some areas. While cleaning, don’t perform circular motions – some ‘unseen’ stains may remain. Fabric stretch ceilings are simple and unpretentious in care. But you should avoid using sponges, brushes and abrasive cleaners – they can damage the surface. There are many aerosols and polishes designed specially for fabric stretch ceilings on the market today. In order the fabric stretch ceiling not to lose its original beauty, you should wipe them a dry napkin from regularly (once a week is quite enough). An alternative option for such a care may be the following cleaning procedure: apply 10% solution of ammonia to the cloth and wipe the ceiling carefully in a ‘half-dry’ way.

