Most of modern apartments are made of panels where the ceiling is made of slabs. So, the slabs completely cover the room in some places, and it sometimes happens that their joints are visible on the ceiling in the form of a huge strip – it’s very ugly and makes many homeowners feel sick. A suspended ceiling is the design that will help to get rid of such problems. As a rule, drywall is used as a finishing material.
What is a suspended ceiling?
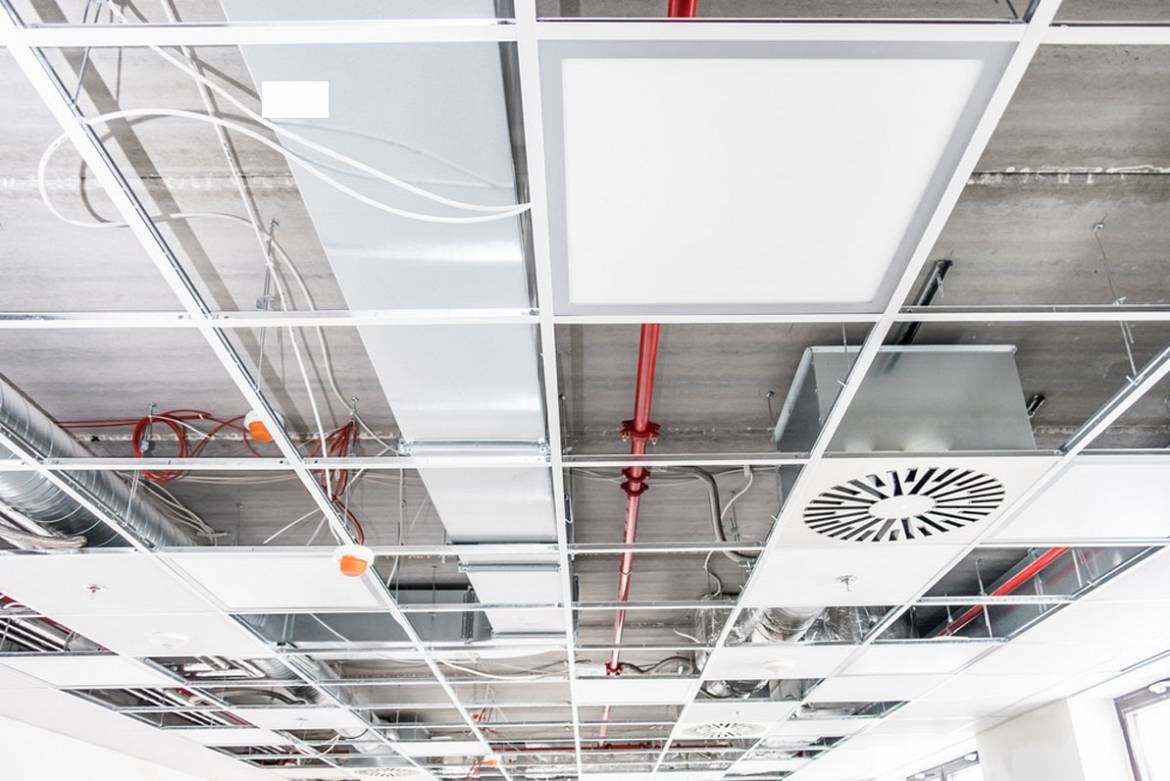
A suspended ceiling is a structure that is fixed on a special profile (aluminum or plastic) under the main (constructional) ceiling in the room which helps to create good-looking and accurate forms for the premise.
The advantages of suspended ceilings:
- A suspended ceiling hides all the shortcomings of natural ceilings, perfectly leveling the differences in heights.
- The structure preserve of the height of the walls – while installing it the height of the walls doesn’t suffer at all – it takes not more than 2 inches.
- It protects of the walls and the entire room from flooding from the upper floors.
- It can be installed in rooms with high humidity.
- Over the time, the structure doesn’t change their properties – it doesn’t darken, burn out, turn yellowish.
- Excellent sound insulation.
- The installation process doesn’t require heating up.
- The service life of the structure is up to 50 years.
- The ceiling is easy to wash.
- A suspended ceiling almost doesn’t need to be leveled – this is a fairly serious argument, because the sheets of drywall have the same thickness.
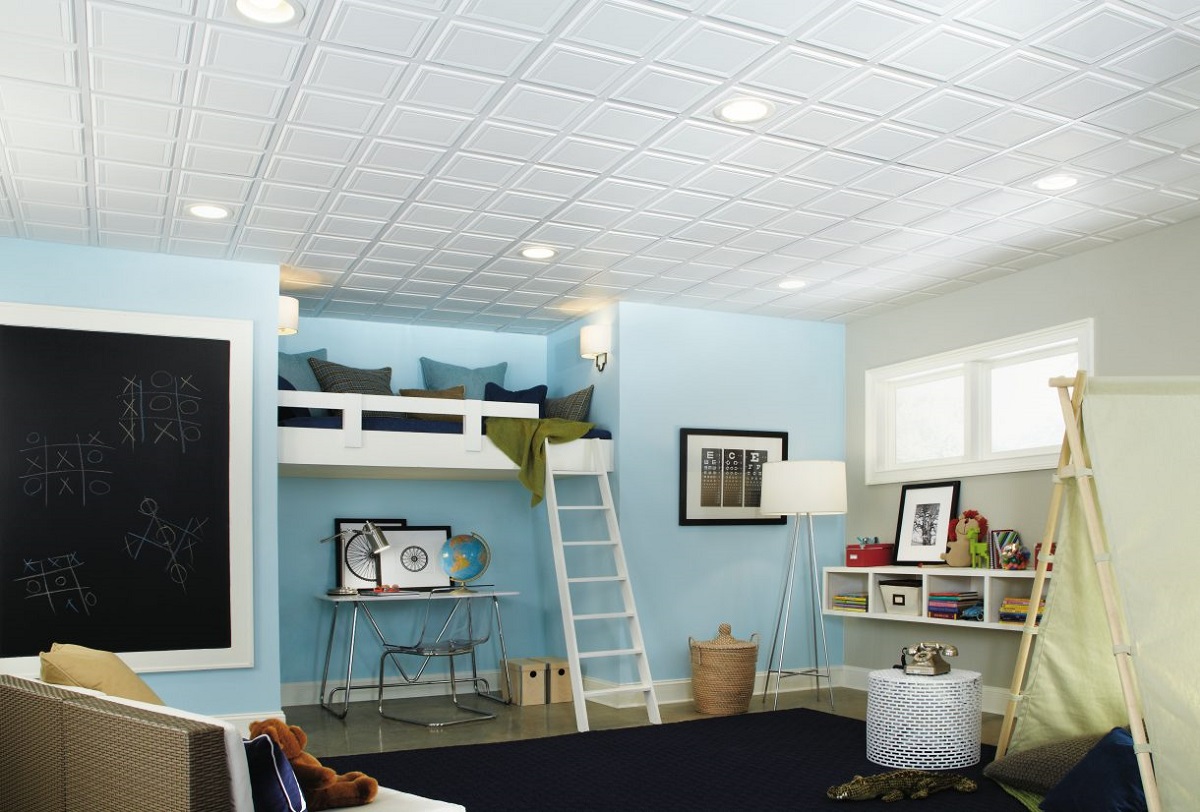
A popular drywall suspended ceiling is easy to install. The accuracy of measurements is a #1 thing that will lead to great result. You don’t have to have special skills or get special tools (unlike while dealing with stretch ceilings). Under the structure you may lay sound insulation, which may be very handy when you are on top of your neighbors. Mineral wool perfectly absorbs noise, even the acoustic stuff (as, for example, from subwoofers). Under the structure you can also hide the electrical wiring boxes, pipes, plumbing, etc. A suspended ceiling is an elegant solution for any premise – the room becomes visually enlarged and transformed.
The tools
So, let’s talk about the list of tools that you may need while installing the ceiling. It’s not so small.
You will need:
- a puncher – as all the details are attached to the walls and the ‘original’ ceiling;
- a screwdriver – it’s better to buy it, because using an electric drill is very inconvenient, moreover – it’s quite difficult;
- a constructional level – it’s desirable to choose a laser one, because this type of work must be performed in a super accurate way;
- a roulette;
- a sharp knife;
- a stepladder.

Suspended ceiling materials
Now it’s time to talk about choosing the materials. It should be noted that it’s highly not recommended to keep to low prices, because cheaper drywall may soon start crumbling, such profiles may be too thin and easily bend. Dowels shouldn’t be cheap, too, because they hold the whole structure.
The types of drywall
There are 2 types of drywall:
- simple drywall,
- moisture resistant drywall.
Drywall is an environmentally friendly material. The standard sheet of drywall has a ‘core’ consisting of natural gypsum, which is pasted on all sides with cardboard. Simple drywall has 93% gypsum, 6% cardboard. The remaining one percent is starch and an organic surfactant.
Moisture resistant drywall is a high-quality finishing material designed specially for the installation of suspended ceilings, interior partitions and for manufacturing sound-absorbing and decorative parts in rooms with high humidity. Moisture resistant drywall is traditionally a rectangular sheet consisting of two parts of a special cardboard, between them there is a layer of gypsum dough with reinforcing and antifungal additives. All the edges of the sheet are rolled with cardboard edges (face layer).
Comparing the 2 types
Moisture resistant drywall differs from the simple one not only with a special composition of cardboard, but also with additional antifungal, hydrophobic properties, included in its gypsum ‘core’. It also provides exhaust ventilation. In addition, while installing moisture resistant drywall, its surface may be additionally treated with waterproof primers, PVC coatings, paints, etc.
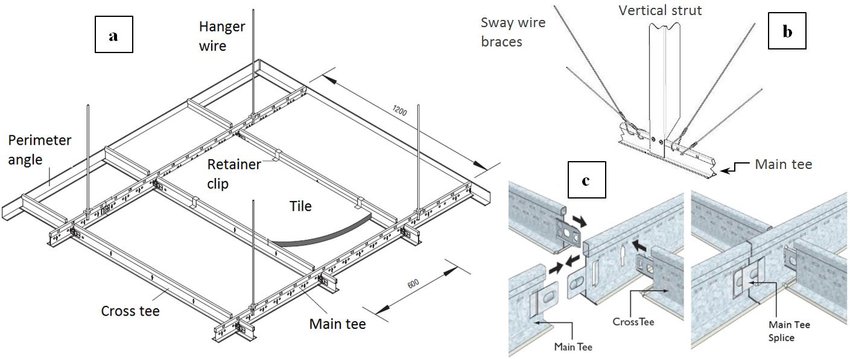
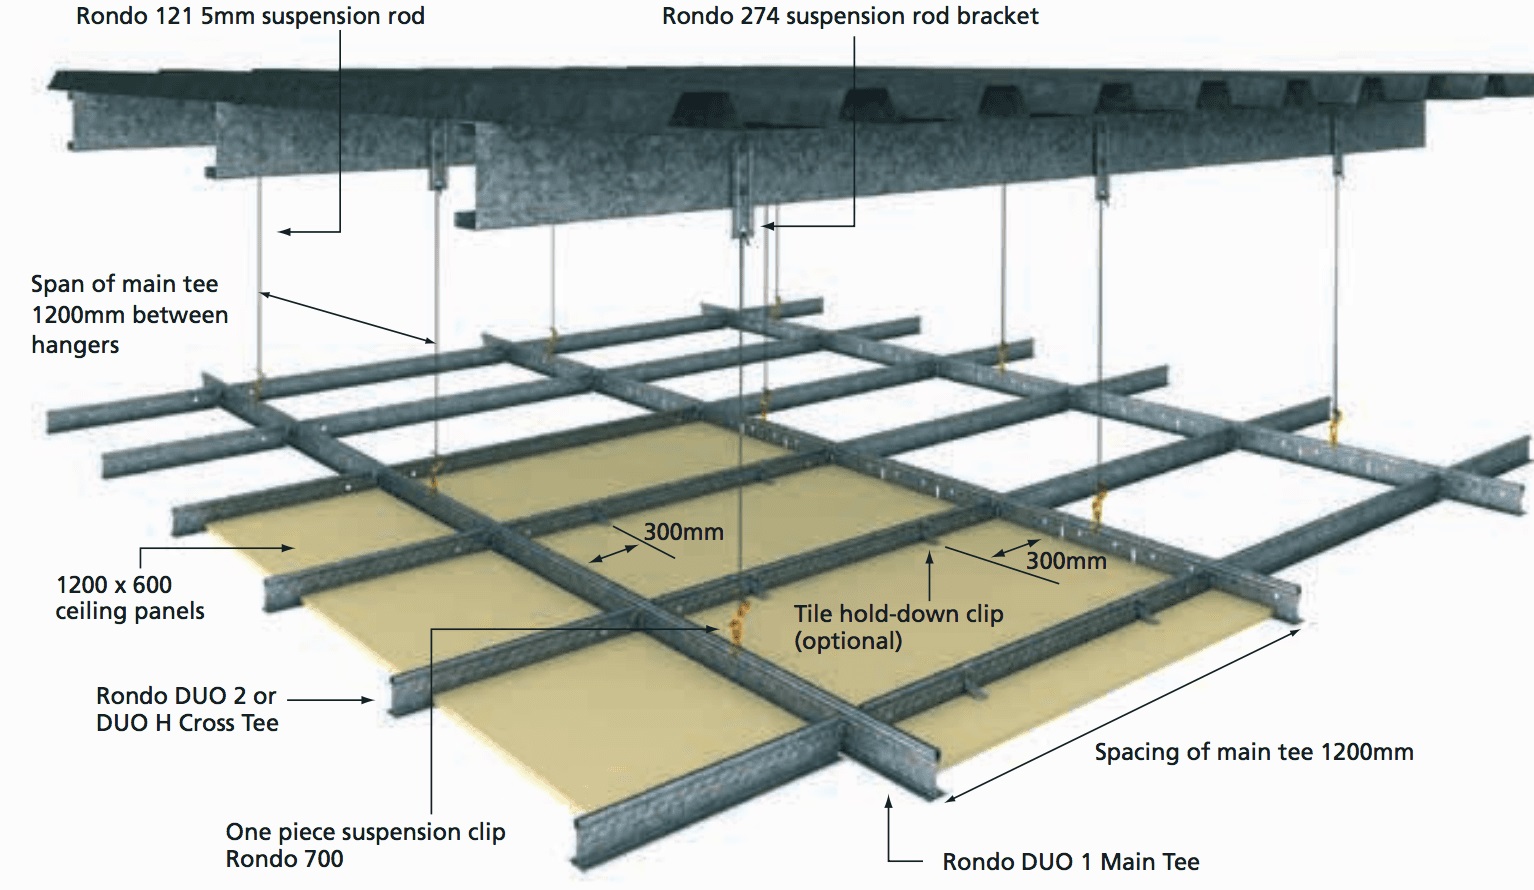
The parts of the suspended ceiling system
1. Metallic profile.
Many people replace this material with bars, however, metal profile has a number of advantages, like easiness in installing, longer service life, simplicity of the cutting process, etc.
2. Drywall.
To finish the ceiling it highly not recommended to choose heavy models (12.5 mm wide) – ‘light’ 9.5 mm models would be a perfect choice. In addition, you must pay attention to the room in which the ceiling is installed. If it’s a bathroom or a kitchen, you can’t stand buying moisture resistant drywall. In order to save time you may also choose drywall sheets having a finishing chamfer.
3. Hardware.
They are represented by a huge range of different little things – dowels, hinges, brackets, screws and other small items.
4. Soundproofing.
The choice on the market is very rich, but there is one main principle – the thicker, the better. If communications are laid on the ceiling, for example, electrical wiring, then the structure must be ‘packaged’ into the corrugation.
5. Putty.
This is an integral material. You can also use reinforcing paper. The latter is mandatory, otherwise the seams will appear through the putty in the form of cracks.
6. Final finishing material.
It can be anything – according to the tastes and preferences of the homeowners.
Suspended ceiling installation process
After everything is purchased, all the materials must be put in the room where the work will be performed and left there for at least two days. This is necessary to ensure that materials are used to the environment and won’t shrink or change its size in the future.
Marking
First, you need to use a laser level and mark the horizontal surface along the entire perimeter of the walls. For this, it’s better to use a pencil, because a pen or a marker may appear after painting or other finishing. After that – every 2 feet – you should mark on the 2 opposite walls (‘bearing walls’) the attachment points of the bearing profile. Then do it on the other 2 walls (‘not bearing walls’). Here the distance between the fasteners is 1 feet. Then, in the marked places cross bars will pass in all directions. It remains only to determine the places of their intersection on the ceiling. The process itself is called the hanging process, because the whole structure will be indeed hung on hinges that are attached to the ceiling. It’s not difficult to guess that there will be loops in the intersections. But don’t install them in each place – choose the 50% variant.
In general, the installation of suspended ceilings with your own hands is very much alike plastering of walls. The work is complicated by the fact that everything is done on weight, and it’s necessary to look up, which is somewhat inconvenient. In addition, this kind of decoration can’t be made alone.
Suspended ceiling installation
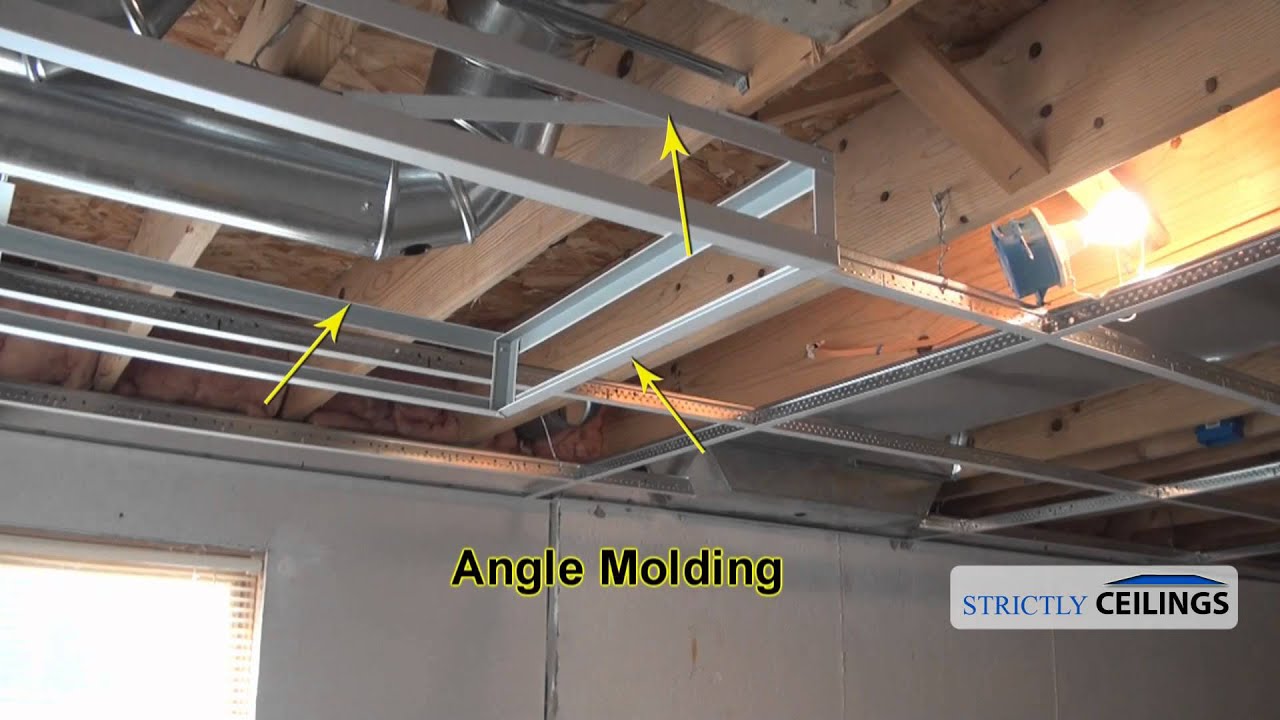
To begin with, you need to fix the hinges in the ceiling. Some people decide to do this at the very end of works, but then it becomes extremely inconvenient, because of the presence of a crate. For their fastening, use dowels and screws of the same type, but of increasing length and diameter. Then, fix the bearing profile on the walls, in the same order in which the marking was done. Then install the crossmembers. Here you need to be extremely accurate at this stage of work, because the slightest gap in the fixing of the profile will lead to the inevitable backlash, and this is very unpleasant situation that will kick you back to the very beginning. After that, you only need to fix the frame on the hinges.
Soundproofing
Here everything is quite simple – cut out the sheets of the necessary size and stack them in a frame. In places where there can be some work (junction box, counter, some kind of cranes, etc.), you must leave some extra space, which will have free access.
Installation of drywall
If you bought a simple drywall (without chamfer), it’s preferable to cut the edges of the joints at an small angle. It’ll come in handy while puttying – it’ll be easier to level the surface.
Tricks from the pros:
- Quite often, the walls don’t have perfect evenness, so it’s advisable to attach the sheet to the future site and mark it with a pencil.
- After the sheet is cut, it can’t be turned in any case, because the relief of its plane is still not perfect.
- In places of fastening, it’s necessary to drill holes with a drill – not with a screwdriver, otherwise the fitting will not be dense.
- If there are any serviced nodes, it’s necessary to make openable hatches.
- To fasten the sheet, you must do it first diagonally to avoid breaking the corners.
Rough finishing
First, you should take reinforcing paper and put it in the seams (joints). If the chamfer was removed in the right size, there should be no problems with it. Then, you should take a small spatula (2-3 inches wide) and carefully cover the seams. The same thing must be done with the screws of self-tapping screws: otherwise they will start to rust over time, and red spots will appear on the finishing. After this, it’s desirable to leave the room for a day or, at least, for 12 hours. It’s very important at this stage to allow the materials to dry (not only putty, but drywall as well), because otherwise the further processing may become useless.
Final finishing
After the seams dry, you can perform the final finishing of the coating. It’s extremely important to use a wide spatula (2-3 feet wide!), because on such an area it’s difficult to bring an even area. While finishing the ceiling, you can use a liquid filler, which can be applied even with a roller, because the probability of formation of streaks is minimal. Now, naturally, after the putty has completely dried out, you can use a grinder, because to perform this treatment manually is very difficult. For processing, you first need to use a pellet with a grain #100, after that it’s advisable to go through #120 to make up for all the risks.
IMPORTANT! Everyone should understand that the ceiling is never installed during other repair and finishing works, it should be installed last, literally before the furniture is arranged.
Lightning, color & ventilation
Consider the lighting scheme for the room in advance. The perfect variant is when the fixtures are installed on the same day as the ceiling, because companies that are engaged in electrical work don’t always have technicians who can work with suspended ceilings. You can install a luminaire on such a ceiling at any time, but if a person does not have experience, the result may not be very great.
Remember that between the constructional ceiling and the suspended ceiling a condensation a condensation may form – spoiling the canvas. To avoid this, special ventilation holes are made in the ceiling. If the area of the room is quite large, a ventilation grille is desirable.
Suspended ceilings have certain requirements for lighting sources. Don’t use too bright and powerful lamps – constant heating may deform some types of drywall ceilings or lead to the changing of its color. The power of ordinary lamps should be less than 60 W, of halogen ones – less than 25 W.
Suspended ceiling don’t have to be white – the choice of colors is huge, from pastel shades to dark and saturated ones. The shade should correspond with the entire design and a general vibe of the room. Ceilings of bright colors can visually reduce the room, so, for the apartments with low ceilings light and airy colors are more preferable. Glossy ceilings will visually increase the height of the room. This is an excellent option for rooms with low ceilings. But be careful while installing such ceilings in narrow spaces, for example, in a hall. Due to the reflection effect, distortion of proportions may occur and the room making it look even narrower.
Conclusion
All the works mentioned above can be performed during several days. It’s very important to close the windows and have no people in the room for the entire period of drying of putty. Then the technology will not be broken, and the final finishing material will not be spoiled. Modern suspended ceilings can perform not only an aesthetic, but also a practical function – for example, to provide sound insulation. There are many ready-made insulation materials designed especially for suspended ceilings on the market in USA and Canada today.


This the most ridiculous and poorly written article I have seen; it is clear the writer does has never done suspended ceiling professionally. Take it down.