In this article we discuss the advantages of stud walls, the easiest way of building a stud wall with your own hands and the details of construction process.
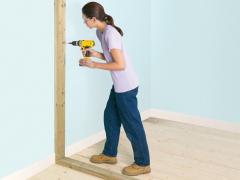 Building a stud wall with your own hands is not very complex and expensive work. One of the most important stages of this work is the proper construction of the walls themselves. The most important thing in the construction process is to secure the protection of timber from moisture. With proper care the wall will serve you for more than 50 years. Here are simple tips on how to build a stud wall.
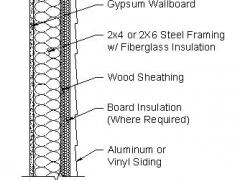
The stud walls of a house are ‘ a pie’ which has a ‘filling’ of vapor barrier, insulation and waterproofing located in the casing of the wooden sheet. Building the wall with your own hands can help you to save on materials without the use of expensive materials.
The main design features of stud walls:
- a bottom rail (represented by the horizontal frame);
- a stud (a carrying vertical bar) the width of which is selected according to the thickness of insulation;
- a brace (increases the rigidity of the structure and strengthens studs);
- thermal insulation;
- hydro insulation;
- internal and external cladding.
Stud materials
 Walls may be formed from timber or logs. The smartest option is timber of 2 inches thick. The same material is used in the construction of beams and frames. In the current stud construction mineral wool is most often used for thermal insulation. This material has many positive qualities:
- lightweight,
- fireproof,
- excellent insulating properties,
- unattractiveness to rodents and other pests.
And remember a simple rule: the less material weighs, the better its insulating properties.
The inner lining of the walls can be made of:
- boards with any profile and cut;
- plywood;
- plasterboard;
- fiberboard, etc.
Don’t forget about the fact that some of these materials (some types of fiberboard) may be toxic and unsuitable for living space. Also particular attention should be paid to the moisture resistance of the materials used for the construction of the walls of bathrooms.
For cladding unprofiled or profiled boards are most commonly used. The boards are stacked horizontally. Unprofiled boards are stacked overlapped; profiled ones are stacked closely.
Prepare the following tools:
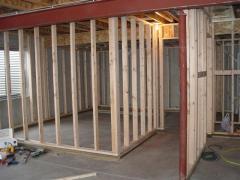 scissors for metal, a grinder or a hacksaw,
- a plummet,
- a level,
- a cordless screwdriver,
- a drill,
- a metal ruler,
- a hammer,
- an angle bar,
- a knife,
- a bastard file,
- a spatula,
- a jigsaw,
- antiseptic (for studs and other items made of timber).
Install the bottom rail on the foundation waterproofing. Lay the floor joists in the slots of the rail. The distance between the joists is recommended to be the same as the thickness of the insulation laid between them. Attach the thin bars to the bottom of the lag. Then treat the structure you get with antiseptic. Place the upper harness to the existing frame racks. Check vertical and horizontal lines across the supporting structure of your stud wall with a level once again (it is very important!). You can check this parameter as often as possible. Install the remaining studs.
The simplest tip on how to build a stud wall with door
Do not forget about door openings. It may be much easier to saw out the openings with a petrol saw on precisely calibrated markings. Using this method, make the slot for the installation of reinforcing bar along 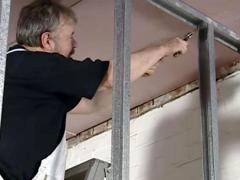 the vertical axis of your stud wall. Door frames are nailed to it. Leave a gap (of about 2 inches) between the top line of the doorway and a box as a wooden structure will fall slightly thereafter.
All angles of your stud wall must be secured by angle irons and screws. Install the upper floors joists. Place them into the slots (the way you did it with floor beams), but they should be longer. Secure the carrying rack frame using struts. You can strengthen everything else as well (if it lacks the material). You can also strengthen the jib from the bottom or top. Once the jib is installed you can remove the temporary outer jib. Cover the outside walls with waterproofing. The work should be started from the bottom , try to slightly overlap the bottom sheet with the top one (in order it does not get wet).
The last step
Perform the interior decoration (it can be horizontal or vertical) according to your personal taste. If possible, nail thin bars to the insulation as you did outside. In the case of vertical decoration bars should be placed horizontally (and vice versa).
We hope this article helped you in answering the question how to build a stud!


How to build a stud wall with your own hands
Pingback: how to build house walls – Relevant Archive