In this article we discuss the way of laying a brick wall with your own hands and main rules of bricklaying technology.
Often people who choose to build their own private house are faced with the challenge of building walls or partitions of brick installation. It seems to be the most convenient option – to hire experienced professionals who had mastered the technique of laying bricks. But not every host has sufficient resources to do it. So naturally the question arises: how to lay a brick wall with your own hands? It should be smooth, reliable and serve for many, many years.
Pre-laying a brick wall
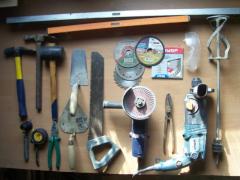
 For building your wall you need to get not only suitable bricks, but also good solution for its installation. The experienced consultants of any hardware store will help you with choosing solution. Also you will need:
- a trowel,
- a shovel,
- a container for your solution,
- a hammer-pick-ax,
- a plummet,
- a level.
 Before you begin make sure that your wall will be laid on a flat and strong base. Then a markup on a base should be done. Do not forget that a markup is applied strictly by a level or a plumb.
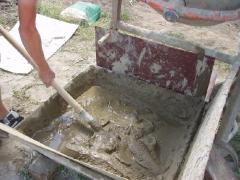
Then you need to prepare a solution for laying bricks and all the tools. The solution is simple enough to do, the main thing is to follow the instructions strictly! For better mixing a punch with a nozzle-mixer can be used.
Bricklaying technology
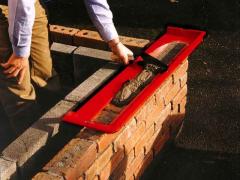
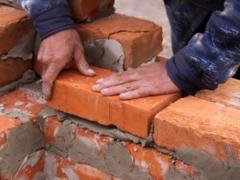
Before laying it is necessary to improve the adhesion between a base and a future wall. For this a foundation should be well-moistened. Then the bricks are stacked on the solution at both ends of your future wall. Your solution should be evenly distributed under the bricks. Until the solution is solidified the bricks are moved compacting the masonry. During this the excess squeezed out of the solution fill vertical joints. It is strongly recommended to leave a seam of about 0,5 inch between two bricks. Then a brick is put on its place. The excess of solution should be removed immediately.
 After you laid the first row you need to check on your marked lines. The correctness of installation of the first row is super important! For future and current control you should pull a rope or a cord under outermost bricks – it will determine if there are some “waves” in your masonry.
During installation the next rows it is important not to forget to check the horizontality of building level every 3-5 rows. While the solution is still fresh your masonry can be corrected.
To make your future wall greater strength you can use a thin wire in your masonry every 3-5 rows. If you want to build a quite thin wall the masonry can be best done in stages, when only one piece is done after the masonry dries. This technology helps to avoid deformations of the masonry.
Ligation and grouting
Professional builders have such a term – “ligation of joints”. This is the order of laying bricks on the surface relative to each other. With proper masonry the joint between the two adjacent bricks of the row should be approximately in the middle of the every single brick lying in the row below or above. It must be done in order to prevent the “peeling” of the wall in the vertical direction, and also for the proper distribution of loads along the entire length of the wall. Ligation of joints is done for proper connecting of bricks in the transverse direction of the wall and the proper load distribution across the entire thickness of masonry.
 Do not forget about the grouting. It is done after the installation of every several rows until the solution dries. Grouting makes the surface of masonry look beautiful by creating a clear picture of joints. You can make it look rectangular, concave, convex, recessed, triangular, etc.
Brick is still one of the most popular and traditional materials for the construction of private house walls because of its obvious good-looking, durability, fire resistance, thermal insulation and environmental friendliness. The minimum life of the walls made of bricks is much more than 100 years.


