How to repair a brick wall by replacing damaged bricks or plastering a crack.
The questions on how to repair a brick walls or how to fix cracks in brick walls concern the owners of brick houses quite often. Exterior walls need repair approximately once per 3-5 years. In most cases, you can fix the cracks or replace the bricks by yourself.
How to replace one or several damaged bricks
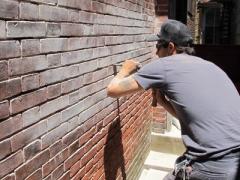 Separate bricks in the wall can be damaged due to harsh weather conditions, some mechanical stimuli or just a manufacturing defect. You can replace broken ones to improve the aesthetic appearance of the wall surface and prevent it from losing its insulation characteristics.
Tools and materials you need to replace broken bricks:
- one or several replacement bricks in good condition;
- ready-to-use mortar mix and coloring;
- stir stick and bucket to mix the mortar;
- mortar jointer (you can replace it with a thin metal rod);
- corrugated cardboard scrap;
- sledgehammer;
- brick chisel (it’s more convenient to use a wide one);
- cold chisel;
- wire brush and stiff scrub brush;
- sharp trowel;
- garden hose and bucket;
- a pair or two of safety goggles.
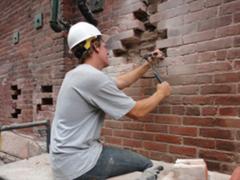
First of all, you have to demount damaged bricks from the wall. Do not forget to put the safety goggles on to protect your hands of being injured. Carefully remove the mortar around these bricks using a sledgehammer and cold chisel. Try not to scrape or chip the surrounding ones. Then use the sledgehammer and wide brick chisel to chop the brick out of the wall. Some blocks are quite uneasy to remove. You can break them up and then chop them out by piecemeal to simplify the process.
Using the cold chisel and sledgehammer, remove the old mortar from the newly formed hole. Then wire-brush it to remove remaining small debris and flush the hole thoroughly with the garden hose.
Prepare the concrete of ready-to-use mix and add some colorant, to make it match the old mortar color. Note that the bonding material usually lightens a bit while drying.
The replacement brick has to soak, so put into the bucket of water beforehand.
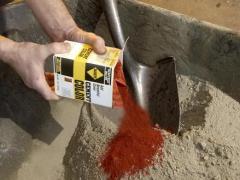 Slightly dampen the hole by spaying it with your garden hose. Put a thick layer of the concrete to the hole. Take the replacement brick from the water and shake it intensively to remove excess water drops. Apply the mortar to its ends and top. Set the replacement brick to the hole and press it firmly until it aligns with the surrounding bricks. Lute the side and top joints with the concrete, smooth it around the replacement brick, filling up all the gaps carefully. Scape down the drops of excess mortar from the surrounding blocks. Then form the new mortar joints using the brick jointer, trowel or metal rod bent.
It will take the mortar 2 or 3 days to dry out completely. Do not allow it to dry too quickly: use a garden hose to spay it firmly from 2 to 5 times a day. When the concrete has set, remove the remains of mortar from the wall with the stiff scrub.
The knowledge base of how to repair a brick wall will help you to save money and efforts.
How to repair a brick wall with a small or deep cracks on it
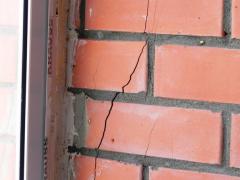
In case if many bricks are damaged with a crack, it is more reasonable to repair this crack than rather than replace all the damaged blocks. Homeowners, who do not know how to fix cracked brick wall consider this procedure to be quite complicated; however, things are not all that bad. Thanks to the instructions provided below you will learn how to repair cracks in brick walls easily and securely.
Tools and materials you need to repair a crack in a brick wall:
- mortar mix and coloring;
- cement and/or exterior paint and paint solvent;
- Portland cement;
- sand;
- hydrated lime;
- duct tape;
- scrap corrugated cardboard;
- cold chisel;
- brick chisel;
 stir stick and mixing bucket;
- sledgehammer;
- garden hose;
- wire brush and paint brush;
- sharp trowel;
- funnel and rubber tuning that fits funnel’s end;
- mortar jointer (can be replaced with a metal rod);
- 2 ? 4 prop;
- wide board;
- a pair or two of safety goggles.
The crack has to be cleaned before you start repairing it. Use sledgehammer and cold chisel to clear all brick and mortar crumbles out of the split. If required, enlarge the crack by widening it with the brick chisel, angled into it. Try to clean the split to its full depth, or at least at the farthest depth you can reach. If possible, wire-brush the split and then flush it using the garden hose.
How to fix a small crack
Small depthless splits are quite easy to repair. First you have to prepare a concrete that will match the color of the old mortar. Mix a small amount of the concrete, add some colorant and let it dry out to see its real color; reply this procedure until you get the mortar of matching tone.
Spray the split intently using the garden hose. Fill the crack with the concrete with a thin small trowel. Try to pack the mortar solidly into the split. Finally, finish the surface by matching new joints on the place of former ones using towel and jointer. Note that the concrete in the split has to set and dry out. Spray the area of the crack several times per day during one week.
Repairing a deep and large crack
 Prepare a dry mixture of sand, Portland cement and hydrated lime (6:1:1). Add the water little by little until the mixture reaches an easily pourable consistency. Stir it thoroughly.
Dampen the split by spaying it with the garden hose. Use duct tape to close the lower third of the crack. To hold the type securely, press it with a wide flat board and wedge it upright with a 2 x 4. Fill the bottom of the crack with the pourable mixture using a wide-mouthed funnel connected to the rubber tubing.
Left the partially filled split to set and dry out during one or two days and repeat this procedure to fill middle and top parts of the crack.
Now that you know how to repair cracked brick wall and how to replace old damaged bricks, you won’t have to spend your funds on hiring the builders.

