How to build a rockery step by step – building tips. Putting stones together.
With stone decorative elements, you can transform your garden and give it a new life. A rockery (a dry stone wall) is one of the most good-looking landscape design elements for your garden. If the question ‘how to build a rockery step by step in my garden?’ is now actual for you, the information below may be useful for you.
Preparing a place for your future rockery
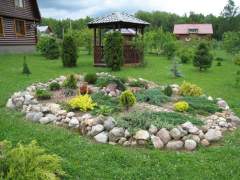 The site where you are planning to build a wall should be smooth – if necessary, align it with the help of available tools.
- Dig a trench of about 8-10 inches wide; stick to the principle that the first row of stones should be located either below the ground level or partially protrude from the pit.
- To calculate the desired width of the trench it should be remembered that the base of the wall should be 50% less than the height of the wall. If you dig a trench on a slope, it is necessary to dig the extra 5-7 centimeters of the wall’s height every feet of the hillside.
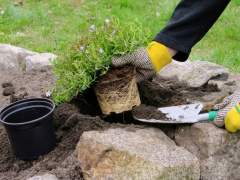 Once you have reached the required depth for the installation of the base, remove the rest of the soil with the help of special equipment for the slag. Only a base with solid ground should remain.
- The wall made of natural stone is laid horizontally in rows. The first row should consist of the largest stones, which should be smooth, long and wide – they should have improve stability. Maybe you will have to spend a lot of time trying to fit them together – but the result is worth it. The construction of such a wall is always like a puzzle – you never know what happens in the end.
Putting stones together
Installation tips:
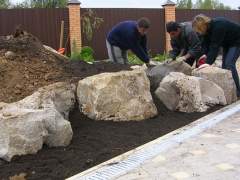 Lay the first row of stones smoothly and as close as possible to each other. In case you intend to create a very flat and neat wall, you will need to choose the stones of exactly the same height and size.
- Make sure that all your stones have been placed from left to right. If you have formed a special bias due to unevenness of the lawn, be prepared for the fact that the stones will settle down a bit.
- Once you are finished with the installation of the foundation (the first layer of stones), you can sprinkle it with the excavated soil a little bit and then start the next layers.
- Begin to lay out the next row of stones still trying to place the stones as close as possible to each other. Important: they have to come into contact with each other in a completely different places comparing with the first row.
- While placing each new stone it is required to make sure that the new one doesn’t cause strong vibrations of the assembly. To avoid possible vibrations, use the flat and small stones as the original seals. In addition, you will need to use a hammer which is suitable for working with stone to achieve the best combination of the stones.
- After the third row you can use the so-called fixed stones. This refers to the stones to be set in a perpendicular direction relative to the foundation. So, you will be able to put the structure of the stone wall together.
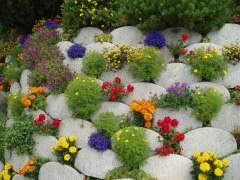 Try to find as many stones that are suitable for the construction of your particular wall – then you will be able to finish the object much easier. If necessary, you can even order them in a construction company engaged in construction of buildings made of monolithic stone. They often remains a large amount of unusable materials that you can handle depending on your needs and use them for your construction.
- When you have reached the desired height of your wall, you will need lay top fastening stones. These stones are to some extent similar to those that were used in creating of the base – they are flat and have a sufficiently large mass. They are required to keep the lower stones in place and give your wall a finished look.
- After you had finished your wall, you can plant the plants in the nearby soil which will help to consolidate the structure (yes, it’s not a myth!). Low-growing evergreen ornamental plants are the best choice. In some cases fruiting plants and vines are also quite a good solution – and they look great.
We hope this article helped you to find the necessary information on how to build a rockery from scratch with your own hands in a proper way.


The next thing to do is to add a layer of rubble across the area for drainage and to create a supportive base for the rocks you’ll be placing on top. Good drainage is key to a healthy rockery garden !
The next thing to do is to add a layer of rubble across the area for drainage and to create a supportive base for the rocks you’ll be placing on top. Good drainage is key to a healthy rockery garden !
How to build a rockery step by step