Marmoleum laying is slightly different from laying other most popular floor coating – how to install marmoleum with your own hands in a correct way.
Marmoleum differs from linoleum in some key aspects – so you may wonder how to install marmoleum in a proper way for it to serve you for a long time. This article contains some very useful tips.
Preparation for work
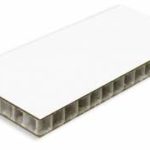
 Marmoleum visual characteristics are identical to conventional linoleum, but, in contrast, it is produced not only in the form of rolls, but also in the form of tiles (PVC) or panels with a locking compound (as well as laminate).
IT’S IMPORTANT! Marmoleum refers to a group of natural finishing materials, as a consequence, it has the ability to change the linear dimensions during temperature changes. So, while laying one should provide expansion joints between the material and the wall (10-15 mm thick) – they will be covered with plinth.
The process of preparing the base
It depends on the base of the material:
- If you plan to stack marmoleum on a wooden surface, you should first and foremost check the mechanical strength of the foundations. And after, make the final alignment of the subfloor.
- If you plan to make lay marmoleum on a concrete floor, you should make sure that there are no dents, cracks, chips, and, if necessary, to align the base with the help of cement-sand or self-leveling mixture.
Marmoleum installation: the technology
 Depending on the type of material used (rolls, tiles or panels) there are different methods for marmoleum flooring installation. Round marmoleum is stacked similarly as linoleum, but it can not be coiled more than 1 time (it is permissible to produce it face-up). This circumstance is due to the fragility of the material and its edges in particular. The material is simply rolled into the room and trimmed on the perimeter. Then, marmoleum is urged to the floor with baseboards and decorative thresholds.
Marmoleum in the form of tiles can be placed on two methods: with pattern matching work and without it. In the first case, the installation of the surfacing material should be started from the middle of the room, slowly moving toward the edges. In the second case, it is better to start laying from the walls, with the smallest dimensions.
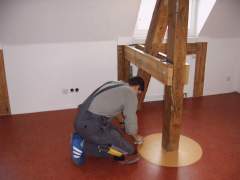 The work involves the following steps:
- In place of laying the first row (near the wall) use the base rail (thickness 10-15 mm).
- Specialized adhesive composition is applied to the inner side of the material.
- The material is simultaneously pressed against the base basis.
- With the second row and all the following rows – the whole process is repeated again (until the full completion of the work).
- After the drying, the adhesive middle-seam voids can be filled with special grout of matching color shade.
Panel marmoleum is usually laid similar to a standard laminate. Joining the panels of marmoleum, due to its flexibility and fragility, is more complicated. Connecting neighboring panels should be performed under a certain angle, thereby providing the most engaging quality floorboards. For a given angle of inclination it is best to use wooden patterns with an oblique gashes (which allow the panel have the optimal angle during installation). Such accessories are placed under the free edge of the trim and then fixed in the groove of the previous row. For the adjacent of the panel the bar is simply removed, so marmoleum occupies the desired position.
Laying recommendations
 For the process not to cause too much difficulties in the course of work, it is desirable to follow some recommendations:
- Tapping of the marmoleum must be performed through special spacer and using a rubber hammer
- Cut marmoleum using a hacksaw or a jigsaw with the respective sawing (small tooth, reverse direction)
- Buy marmoleum in specialized retail centers only they HAVE TO guarantee the originality of the product
- In order to fit a quality basic material bases, it is necessary to remove all dust and debris from the subfloor with a vacuum cleaner
If you are still hesitating about choosing the marmoleum flooring, read about its pros and cons here.
