Many people think that engineered hardwood flooring is impossible to install with your own hands – let’s ruin the myth talking on how to install engineered hardwood flooring yourself.
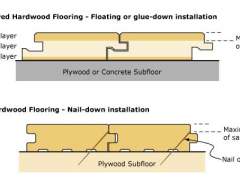 If you decided to install engineered hardwood flooring, you should know that the laying must be carried out at the final stage of repair in the room ONLY – this is the only way to minimize the risk of damage or deformation of the covering. This means that all work on this flooring start after the installing of doors, windows, aligning the walls, etc. The best way to install the flooring is laying it over concrete slabs.
The humidity aspect
Humidity in the room in any case must not exceed 60%. The optimum moisture of engineered hardwood flooring
itself – less than 12%. Although, it should be noted that it’s pure theory indeed. This figure is usually a reflection of the production characteristics (and of quality, in some cases). The market researches have shown, that the moisture content of the solid ash or oak boards is 12-15%; of exotic species (timber treated in tropical countries) – about 18%.
Preparing the subfloor
The main rrequirement for roughing the surface of the subfloor is smoothness. The maximum allowable deviation of construction – two millimeters for every 7 feet. The creaking of the hardwood flooring is 90% a consequence of unaligned subfloor.
Preparing concrete subfloor
The first step is to form a barrier that will be a buffer between the wood and concrete. Better us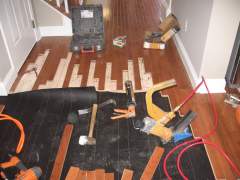 e special construction mastic. This barrier will ensure the stability of the coating and will protect it from deformation. Then you should build the foundation for hardwood flooring.
There are 2 methods of foundation installing:
- mounting lags
- plywood
Method # 1: The lags
The lags are attached to the screed with dowels or screws. If there is a risk to harm the communications, under a layer of screed use the following reasonable solution – sticking lag on mastic (or glue containing bitumen). The maximum distance between the fixing points – 1,5 feet. Levelling bars are carried on a level by removing excess wood planers. On the joists the waterproofing film should be placed, fixed with staples. Now the subfloor is ready for installation of the engineered hardwood flooring.
IT IS IMPORTANT! The space between the joists may be filled with insulating material if you like. But, if you live on the ground floor of a building that does not have a basement, then you should do this in any case!
Method # 2: Plywood
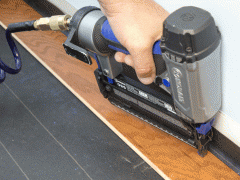 Laying engineered hardwood flooring on plywood is an increasingly popular method for forming a high-quality floor in USA nowadays. As the base, use waterproof plywood approximately 15 mm thick. According to the technology, the boards are cut into strips (width 1-1,5 feet). Spreading must be shifted in order to minimize the possibility of matching corners. Plywood is fastened on concrete using dowels and screws. Each base element must represent at least nine points of attachment. The alternative is fixing plywood with glue.
The engineered hardwood flooring, of course, may be laid on cement screed or without resorting to the use of plywood or mounting lags at all. But these methods can be recommended only be for areas with virtually ideal base, located higher floors of super hi-tech condos.
Supporting constructions
When laying the engineered hardwood flooring, the load-bearing structures – from the tree should be mounted. As a base you can choose plywood, OSB panels or the boardwalk. The edges of the plates should be joined on joists, but not between them. The gap between the sheets must be 2-10 millimeters between the plates and the wall. Plywood and OSB are fixed by screws.
Installing engineered hardwood flooring: the technology
To fix engineered hardwood flooring to the base, use screws to nail down the boards. The laying also includes landing strips in the glue. It is convenient to be applied with a spatula, the adhesive should be distributed strictly according to the board area. Remember that laying engineered hardwood flooring only with glue is IMPOSSIBLE! Additional fixing screws are totally necessary.
Dealing with the interfacing strips, extremely important to consider gaps – in particular, between the boards and walls. Too much distance between floorboards can always be eliminated with the help of wedges. The first row should be laid on the wall slot. The first and last rows are attached also from the front surface of the board. The designated anchorages are subsequently hidden under the baseboard.
Sanding and the application of protective coatings
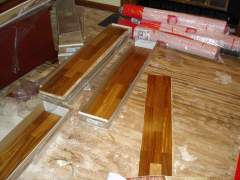 The engineered hardwood flooring with no ready covering should be treated with disc and tape polishing machines for regular parquet. In the corners and along the walls, it is better to use small hand tools. After the sanding, the surface hardwood flooring must be vacuumed or cleaned with a brush. The application of lacquer should be started on the same day. Experienced specialists recommend to apply 3-7 layers of lacquer. After the drying, each of the layers should be sanded with a machine. In general, this process will take you about a week. The number of layers of varnish influences not only on the strength of the future coating, but also on the fashionable mirror-look of the surface.
