The vinyl flooring is a bright solution for your design. But, it looks beautifully only on condition of the correct installation.
The vinyl flooring is a bright solution for your design. But, it looks beautifully only on condition of the correct installation. Here are recommendations about how to install vinyl floor tiles properly.
Materials and tools needed for installing vinyl floor tiles
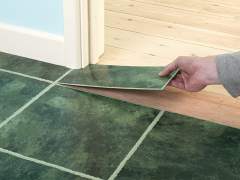 Most types of vinyl tile have a square form, whose side is equal to 30 centimeters. Material strips for the flooring can have different width — from 0.6 to 15 centimeters. To buy necessary quantity of a covering, you need to measure the area and to add 10% for waste.
It is necessary to use the adhesive structure that it is recommended for laying of a floor vinyl covering. The adhesive for a vinyl tile has to answer the established standards and conditions of laying this material. Construction of a vinyl cover is a simple process that requires a minimum of tools.
When preparing the vinyl floor, you should have the following tools:
- pencil;
- marking cord;
- roulette;
- metal angle piece;
- blade knife;
- spatula for glue;
- sponge;
- smooth rubber roller.
Preparation of the basis before installing vinyl tile flooring
If it is self-adhesive vinyl tile, then a process of laying should be begun in such way that construction material has to “mature” for days in that room where its installation will be carried out. The adhesive base of tiles should to be protected from contact with dirt and dust because it will complicate the gluing subsequently. The surface should be smooth, inflexible, coherent, and without paint, grease, and oils. While preparation of plywood draft floor, you need to close up seams, cracks, and joints, and to eliminate roughness.
If it is an arrangement with the sticky basis on “heat-insulated floors”, then heating is recommended to disconnect for a minimum three days before laying and to leave system in the switched-off state for six days of completion of work.
The optimum range of temperatures is from +18C0 to +24C0. Make sure the vinyl tiles base is not wet, as non-compliance with this requirement will provoke the emergence of a mold and fungus on an old floor. Relative humidity of draft floor can be measured by a hygrometer: it shouldn’t be more, than 0.05%. If you would like to install vinyl tile flooring in a bathroom or other damp rooms, it is needed to arrange waterproofing. In addition, you shouldn’t lay a vinyl tile along with carrying out of “dusty” construction processes. If you decided to lay a vinyl tile on concrete, just read useful information, which was provided earlier.
The best way to lay vinyl floor tiles
To identify the place of the beginning of works correctly, carry out a careful marking of room space.
- Find the room center, because from this point all measurements can be performed.
- Move to a wall from the center, in such way you find the proper place to start a laying process of a vinyl tile with joints to the line.
Laying of a tile in a staggered order needs a bit different way of finding an initial position. The most suitable way of definition of the initial point is laying of a tile from the central line in the wall direction.
When the required arrangement of tiles is reached, it is necessary just to draw the line with a pencil along the last row of tiles, nearest to the wall. Along with this line, it is needed to lay full tiles. After that, remove all tiles laid without glue, and start the following stage.
- Adhesive for a vinyl tile.
For gluing of a vinyl tile, take acrylic dispersive adhesive. The glues intended for a vinyl floor have generally waiting time close 5-10 minutes. Thus, the vinyl tile can have adhered only after the “maturation” of adhesive on the base.
All the necessary information is given on glue package for a vinyl covering. Carefully study an operation manual of this glue. Listen to recommendations of manufacturers and pay attention to service conditions of future covering. The optimum consumption of the used glue reaches 0.3-0.5 kg per square meter
- Gluing of a vinyl tile
- The tile can be cut by means of a stationary knife, but as edges will be quickly rebated, it is recommended to have spare one near at hand.
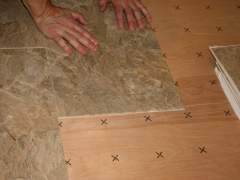
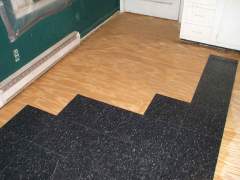 When gluing a vinyl tile it is necessary to avoid exposure to the air cover. It is impossible to lay vinyl floor tiles closely to walls, it is necessary to leave a small gap. The adhesive should be applied at uniform portions without leaving any glue clots and untreated plots.
- If you want the glue to be applied evenly and in that quantity that is required for a covering, it is recommended to use the notched spatula with replaceable blades. In such way, the necessary consumption of glue will be provided. When you lay a tile on the not smooth basis, it is possible to use the household hair dryer to give the tile greater plasticity.
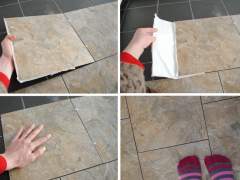
- Having glued a vinyl tile, it should be rolled with a special roller or heavy grind using a corkboard. This is done for better adhesion and for removal of bubbles. The gluing surplus that was made on seams, it is necessary to remove with a damp sponge or a sponge moistened in alcohol-containing structure, before the adhesive begins to dry. In half an hour roll a vinyl tile once again.
- After gluing of a floor covering, the vinyl tile doesn’t need special processing of joints. The exception is made for especially damp rooms, for this purpose, it is accepted to use cold welding. Seal of seams is made in two days after laying. If you close seams too early, it will badly affect on gluing and will provoke defects of an edge of a seam.
Care of a vinyl covering
In spite of the fact that a vinyl tile is a rather unpretentious material, there are some rules connected with cleaning and care of vinyl floors.
- To not let a lot of sand and dirt get to the room, experts recommend laying special rugs which are capable of taking over some of the garbage about an entrance and allowing to avoid the premature attrition in the most passable places.
 It is recommended to wash a vinyl tile with the washing substances, which have neutral structure. As a part of detergents, there shouldn’t be a bleach and ammonia. The special chemistry for vinyl coverings will become the best choice. After damp cleaning, wipe a floor with a dry rag. In an extreme case, if the surface is very dirty, you can use a specially polished machine.
- Remove all sharp and rough tools which can damage and scratch vinyl far away. Put protection on furniture legs, so they will not scratch the floor when you plan to move the headset. Many manufacturers in use of a vinyl self-adhesive tile do not strongly recommend to use any mastics, turpentine, and acetone because they can damage a tile surface.
