Manual on how to replace an exterior door using available tools and materials. Proper measurement and dismantling. Stages of mounting a new exterior door.
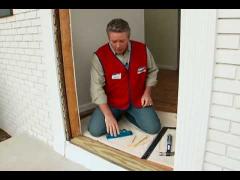 When carrying out repair of the hall or renovation of the house on the whole, you are probably looking for a way how to replace an exterior door. Here are some guidelines that may be handy.
Measure the height and width of an old door. The difficulty lies in the presence of the door frame and a thick layer of plaster along the perimeter. So, the new door is to be 20-25 mm narrower on each side. Before installing a new door, you need to completely clear the doorway of the old door and its elements.
Removing the old door
 First of all, remove the door leaf from the door frame. If the door leaf was fitted to the frame by collapsible hinges, you have to open the door at the angle over 90 degrees, and by placing the crowbar or scrap iron from below of the door leaf, lift it till it comes off the hinges itself.
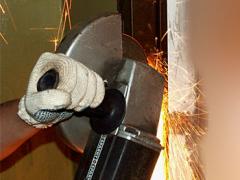
If the hinges are rusty or warped and do not pull off, you can try to unscrew them with a screwdriver. Also, the leaf hinges can be simply cut off by a grinding machine. Dismantle the threshold and door casings (if there’re any) using a crowbar.
Further, you need to dismantle the very door frame. If possible, you should pull out or unscrew all that holds the door frame (nails, anchors, screws) and cut its sides in the middle. When using a scrap iron or a crowbar, they are easy to remove. The lower and upper elements of the door frame mostly do not present any difficulties when being removed.
If the old door was installed on a metal frame, which was secured by welding, it is required to cut the bars to which it had been welded using a grinding machine. It is advisable to unscrew or pull off all the fixings. If it is impossible, cut them with a grinding machine or a hacksaw and hammer the parts sticking out back into the wall.
After exemption of the door opening, it must be thoroughly cleaned from old plaster, mortar, nails, insulation and other material, which hinders the installation of a new frame.
Mounting the door frame
First, you need to fasten the door frame evenly in the door opening. Procedure of installation is similar for both metal and wooden doors. This is performed using small wooden wedges, which in their thickest part must exceed the value of a special technological gap. Wedges must be carefully driven into the bottom and top of the frame and on its sides. The main thing is to sustain the technological gap between each side of the installed frame and the wall. Too wide gap is not needed, ?–1 inch is quite enough. Check up the gaps, whether they are equal on all sides.
Hanging the new door
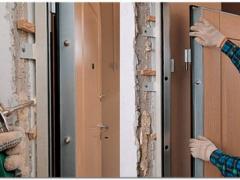 In case you master a technique on how to replace an exterior door in your home for the first time, be aware that aligning of the exterior door is started with the rack which has door hinges. This can be accomplished with the help of an ordinary building level or a plumb. Then you need to check both inner and outer sides of the frame. Thereafter, using a drill or even a punch, drill holes through the mounting plates. Holes’ depth should be 4-5 inches and the diameter should be about ? inch.
Anchor bolts are screwed (or metal pins are driven) into the holes, and again you are to check everything with a level. When drilling, the door frame is likely to move. If everything goes on well, you can do the welding or final fastening of anchor bolts. After that, the door leaf can be hung. Do not forget to lubricate the hinges; if the design includes balls, put them into the hinges. After hanging the door leaf, excess grease will be squeezed out, and it must be immediately removed.
 Now you can start leveling the opposite rack of the frame (the lock side). Prior to this, all the necessary hardware is installed on the door and on the rack. Covering the door, thereby displacing the rack, it is necessary to make sure that the gaps on all sides are the same: about 2-4 mm. Then, as with the previous rack, fix it to the door opening. Before ultimate tightening of the anchor bolts or welding the bars, ensure that the door is free to open and close, and the fittings function effortlessly. Of course, without welding and anchors, metal bars can be riveted off. You can do it with a big and heavy hammer or mallet. However, this process requires special accuracy. Just one wrong hit and the whole geometry of your design is broken.
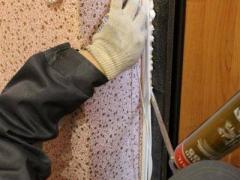
After the final fixing of the door, technological gap between the frame and door opening must be filled with polyurethane foam. In order not to smear the frame with foam, carefully seal it with the masking tape. To securely fasten all your work with foam, the technological gap should be lightly moistened. Typically, to foam all door perimeter, you will need only one standard bottle of foam. Use the cylinders which allow inserting in a special gun. This will add convenience and help save foam.
For complete drying of foam, at least 24 hours is required. Once dry, you can start plastering the mounting plates and space between the frame and door opening for further trimming of the door jamb.
