In this article we discuss one of the final stages of a private house construction – installing a drip edge on a roof.
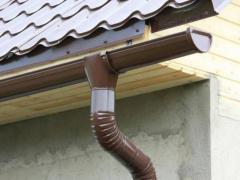 The final stage in the construction of houses is considered to be the installation of the roof system. When choosing a soft roof it is necessary to solve the question of how to prevent the harmful effects of excessive moisture. The easiest way to drain the water from the house coating is to install a flat drip edge on your roof. Here is he simple tips on how to install a drip edge on a roof with your own hands.
4 main reasons a drip edge in installed for:
- hardening of the roof;
- improving the general aesthetic look of the roof;
- protection of air masses;
- discharge of wastewater streams.
It is often made of galvanized steel and covered with special coating which has anti-corrosion properties. The color of your drip edge should match the color of your roof. It must be fastened on the entire length of the eaves. Using drip edges fits the roofs of all types, but it is especially important when you deal with tile roofs.
Types of drip edges
- Cornice drip edge
It fits perfectly for installation on the eaves.
- Pediment drip edge
It is used for mounting on the gable overhang.
Drip edge should be installed on the edge of the roof and should be directed straight down, so water can easily be directed into the chute for water.
Why do we need a drip edge?
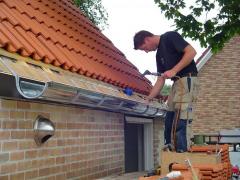 When a drip edge is installed, the moisture runs down without staying too long on the elements of wooden or metal structure. So, there is less risk of premature failure of the roofing system.
- Due to the absence of excessive moisture in the roofing system, harmful microorganisms will not develop on your roof; the processes of decay will not start too.
- A drip edge protects the roof from a possible destruction by a crosswind.
- When you have a drip edge, the house structure will have a neat look thanks to a pleasant roof contours.
- A drip edge adds the additional strength to your roof.
How to install a drip edge on a roof?
It is better to know before you start:
- If there is a protective layer of film on your drip edge, remove it before you start working.
- Use nails in the following calculation: 1 nail in every 6 inches.
- For better connections you can cut corners’ stiffeners.
There are two existing approaches to the installation process:
- Approach # 1 is about the installation of the holders (hooks) to the rafters. The main thing is that fixing is carried out after the installation of lathing and before installing drip. Perhaps, this approach is the most reliable one.
- Approach # 2 is about using holders made of plastic which are mounted on a fascia board; such attachment method can not withstand avalanches of snow in the winter time, so it highly recommended to be used on roofs with a minimum angle of inclination only.
The installation process
Step 1: Strip after strip
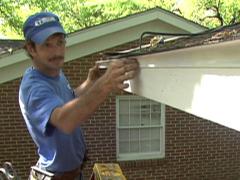 A cornice strip is fastened on the lathing, starting from its its founding. The lower part is directed to the gutter. The following cornice strip needs to be fixed overlapped. Then a front-line bar is fastened for the lathing with a protective purpose.
Step 2: Connecting with piles
Over the drip edge cornice tiles are attached, and then the rows of shingles are laid.
Step 3: Destroying slits
If some slits are formed somewhere they should be immediately treated with silicone sealant. It is also applied to all joints.
Important!
If a drip edge is not properly installed, the formations of ice masses on the wind boards and the tap is possible. This may be due to non-fitting of a drip edge closely to the gutter.
On the roofs of mainly metal-coated during the seasonal periods of regular temperature changes much condensation appears, and it will inevitably drip onto the heater constantly. To avoid the heater getting wet, you should lay the extra layer of waterproof fabric. It is mounted upwards on the slope of the roof.
Other common problems appearing when a drip edge is not properly installed:
- If the drip is not installed correctly, the winter frost will constantly form in winter.
- If a drip edge is not installed on the tile roof, then condensation will be constantly keeping under the tiles.
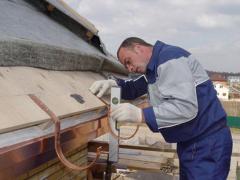 If the wrong output film was chosen, the water will start to flow in the opposite direction and will get to the truss system finally. This will cause swelling of wood elements and will lead to formation of mold and rot.
We hope that it is clear for you now that you shouldn’t save time and money when choosing a drip edge for your roof and it is necessary to take a serious approach to its installation. This simple thing will protect your house and the health of people living in it during the cold season!
We hope this article was useful for you while searching the tips on how to install a drip edge on a roof.
How to install a drip edge and why it is so important