Arguments for application of internal wall insulation. Factors that should be taken into account. Methods and stages of installation.
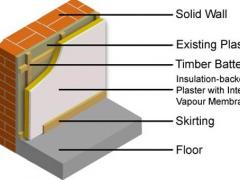 To provide protection of your home from cold and harmful effects of condensation it is necessary to qualitatively insulate the walls that are exposed to freezing during winter. Of course, the maximum effect can be achieved when the wall insulation is done on the outside. But the outer wall insulation is an expensive measure. Besides, sometimes it is impossible to install the outer insulation. The way out in this situation would be an internal wall insulation of your home. By the way, interior insulation is easily performed by yourself, and it does not require any specific knowledge and skills.
Consider the Dew Point and Condensation
 When insulating of the external wall, its temperature increases, and the dew point is moved towards the exterior surface. On the contrary, internal insulation tends to keep the ambient temperature of the wall and thereby bring the dew point closer to the interior surface. Too close placing of the dew point regarding to the interior surface of the wall can cause absorption of moisture by the insulation material. Therefore, to prevent damp infiltration, a vapor barrier layer must be installed.
On the stage when the insulating is accomplished, the inner surface of the insulated wall is going to be warmer with minimal risk of condensation. But the joints between the external and internal wall may still remain cold. In order to overcome this, when mounting the insulator you need to ensure that the blocks of the material are tightly fitted so that there are no cold bridges.
Observe the wall condition
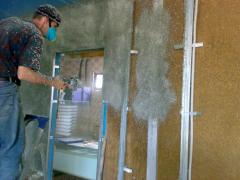 Before you start, it is essential to examine the condition of the wall. This will determine the needed preparation work and the suitable application technology.
In case of a damp wall, you have to start with eradicating the cause of moisture, otherwise the interior wall insulation will bring greater troubles with moisture, so you cannot do without installing a waterproof course. Another way out is creating a cavity between the mounted insulation and an existing wall itself.
-
Choose the proper type of insulation
Among commonly used types of internal wall insulation there are rigid foam boards, mineral wool or natural materials, e.g. sheep’s wool, cork or wood fiber board. The rigid foam has obvious advantages before the alternatives due to taking up less area, and it can also comprise a vapor barrier.
How to install internal wall insulation
Here are the basic stages of the internal wall insulating:
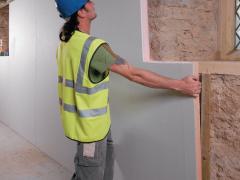 Clear the wall surface of everything fixed on it: light switches, curtain tracks, radiators, pipes, plug sockets, covings, cabinets etc.
- Examine the wall condition and carry out preparatory work.
- Ask the insulation manufacturer to define the placing of the dew point at the chosen thickness of insulation.
- Make up your mind on a certain method of installation.
- Decide on dealing with floor cavities, reveals and other likely cold bridges.
- If necessary, build the additional stud wall and fix insulation material.
- Seal joints and putty the degreased plasterboard.
- Install the light switches, sockets and other necessary fittings.
The first installation option presupposes bonding the insulation along with a vapor barrier to the plasterboard. This can be rather effective in case the wall is in good condition and flat.
Boards are glued right to the wall by means of a specific adhesive. If necessary, you can use mechanical fixings. All the joints and cavities are caulked with mastic and taped over prior to skimming the plaster to provide continuity of the vapor barrier. However, when approaching to this method, a challenge with refixing heavy items can arise later on.
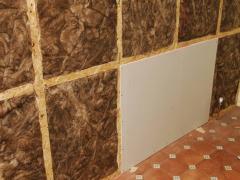
The second way consists in battening the material on the wall. You can opt either to fixing battens first and then proceed to even fixing of the insulation, or fastening the insulation by mounting the battens over the material. For both use of 25x50mm battens is required. The former method can be the best option for uneven walls. However, screwing the insulation to the battens will lead to holes in vapor barrier.
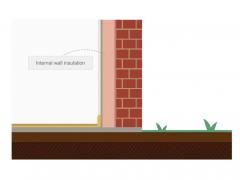 The latter method is less used but it has an indisputable advantage. A wool batt is attached right against the wall. The battens are installed on top of it. Next, you add rigid insulation, which is mounted between the battens. Finally, the wall is covered with plasterboard. Thus, the insulation keeps the battens warm and they are least likely to decay; the battens that are accessible under the plasterboard can be used for hanging things.
The third option presupposes constructing a 4 inches thick stud wall on the inner side of the existing wall, with a 50 mm gap between them. This approach is rather expensive; in addition, it takes up room space. Its use is reasonable in case of extremely damp walls. For the proper operation of a stud wall, you will need to provide proper ventilation of the cavity.
Recommend:
What is cavity wall insulation and what to do about it?
Such an interesting piece. Thank you for creating this article