How to install rubber flooring in your apartment or private house with your own hands without professional help.
Rubber flooring is still may be popular for different reasons. Here we talk on how to install rubber flooring yourself.
Main characteristics of rubber flooring
 Rubber flooring has the following positive characteristics:
- high resistance to aggressive environmental factors;
- super water resistance;
- high degree of sound absorption;
- high degree of vibration absorption;
- anti-slip effect;
- long life.
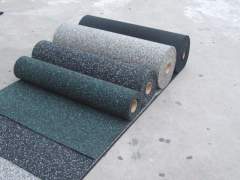
It should be noted that the thickness of the rubber layer in the form of the roll can be up to 6 mm. The minimum value of the thickness is 4 mm. The fabric width is traditionally 4 feet. With regard to the characteristics of rubber tiles, they are the same. The differences lie in the following. Rubber tiles may have the following dimensions
- the width and length of the most diverse;
- the thickness of not more than 3 mm, less than 2 mm.
Installing process
 Flooring plays a crucial role in any room, whether it’s a kitchen, bathroom, gym or a playground. Therefore, it is important to choose the floor that is both functional and aesthetic. But, it is equally important to take care of the floors to get the most out of them. Rubber flooring is among the best options, as it is hard for it to be pressed under the weight of the furniture, it’s colorful, warm and beautiful.
Rubber flooring is produced in a variety of textures, with smooth and silky surfaces. It is not slippery. Rubber flooring absorbs sound much better than any other coatings. The process of installing rubber tiles is not very complicated and it can be performed independently without the help of professionals. You should follow quite simple steps.
The surface preparation
All types of most common subfloor surfaces – such as concrete, wood, even asphalt – are suitable for rubber tiles. You just need to make sure that the surface has the same level as rubber tiles have. Laying on concrete may be called the best option, but it’s not the only one.
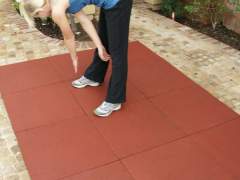 It is best to use a vacuum cleaner to clean the surface from dust, dirt and other debris. If vacuum cleaner is not available, you can simply use a broom and clean up the subfloor as good as possible. Then wipe the area with a damp cloth to remove any oil, grease and substances which may interfere the future installation.
Before the installing, let the subfloor to dry completely. Rubber flooring tiles are placed on a clean subfloor surface and then left for 24 hours before installation. This will allow the flooring to adjust to the ambient temperature and humidity conditions. For some people, a strong smell of new rubber flooring can be bothersome. In order to reduce the odor, clean the tiles with a damp cloth and open the windows for a few hours.
IMPORTANT: After the proper preparation of the subfloor surface, your rubber flooring should be installed as soon as possible!
Depending on the flooring type, we may talk on how to install rubber flooring tiles or to lay rubber flooring produced in rolls. The difference is minor.
The order of works
- First of all, it is necessary to insert the connector pins into predrilled slots on two adjacent sides of each tile or a rolled segment.
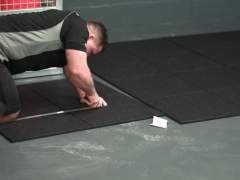 Place one piece – tile or a rolled segment – in the corner of the area you intend to cover.
- Take the second tile or a segment and align it with the pre-drilled socket connector of the first one; plastic pins and grooves are naturally aligned.
- Carefully tip the side of the second segment and enter the first slot.
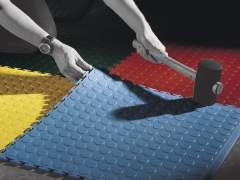
- Use your hands to connect the segments together as close as possible – if you feel resistance using a rubber mallet, then tap the tiles together to remove the gaps and avoid them in future.
- Using the same method, lay the segments in a row in a straight line until you reach the opposite end of the square, then move on to the next row.
- When all the tiles or segments are suitable, there may be no need to cut them.
So, we can say that rubber flooring is a great option for any home.
