Types of ceiling insulation. Suitable material. Detailed description of ceiling insulation technology. Peculiarities of cathedral ceiling insulation.
There are two methods of arranging ceiling insulation. Bulk is fit between the ceiling joists or rolls laid over them, and loose-fill type that is blown in.
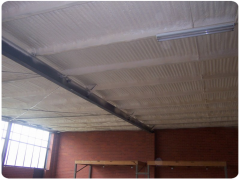 Bulk insulation is considered to be the best solution for ceiling. It is available in two types: rigid boards, which are mounted between the joists over the ceiling, and blanket material, intended to be rolled out atop the ceiling and across the joists. Segments installed between joists must be of higher R-value to handle the heat lost through the beams.
Blanket insulation creates a solid coverage for intermediate spacing between the beams as well as for the very timber joists preventing heat loss through the latter. Blanket insulation is more suitable for topping existing insulation, as it can be much easier to install comparing to boards or segments: it is just rolled over the insulation which has already been set.
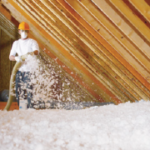
Loose-fill insulator is blown atop the ceiling. It’s a suitable option when your roof is not spacious enough to carry out bulk insulation. When installing loose-fill material, you have to provide rigid open-ended bands around heat sources e.g. chimneys, flues, downlights fittings and extractor fans in order to maintain required safety voids and prevent a fire hazard.
Get prepared for insulating your ceiling
Ensure the power is switched off when you are going to start insulating the ceiling. You ought to work a bit away from any wires around the ceiling space. The insulation material should be away from any wires or lights to preserve it from ignition. It’s advisable to install insulation early in the morning and not to wait till the roof space gets hot. Don’t neglect wearing safety glasses, coveralls, dust mask and gloves as some types of insulation may cause allergy or irritate your skin.
How to install ceiling insulation
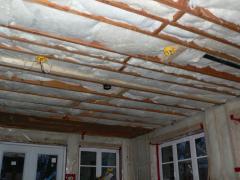 Measure parameters of the ceiling area, measure the spacing between all adjacent joists and cut the first board to size insulation to the measured gap.
- Use a ladder to get on the upper side of your ceiling and check up for presence of exposed nails, damaged wiring or pests.
- Get everything ready to start the work: workwear, tools, planks, work light, insulation itself.
- Ger started from the furthest spot of the ceiling. Measure up the gap between the framing. Cut the foam board with the straight edge making it oversized by 10-20 mm to provide snug friction fit. Use the cutting board, never cut the material against framing as you are likely to cut through the wiring.
- Get each piece of insulation up strictly before cutting it open. When the plastic wrap is cut, the insulation rapidly grows in size and you’ll have to lift it up one piece at a time.
- To add insulation to the insulation into inaccessible areas, use the rod or broom handle.
To prevent any moisture from soaking into the insulation, you have to attach the boards leaving at least 25 mm between the insulation and the bottom side of the roofing material. You may need to cut a small void in the insulation coating to achieve this.
Specifications of cathedral ceiling insulation
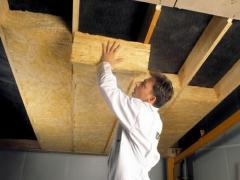 A cathedral ceiling represents a slanted and peaked ceiling structure that is mostly high and open. Such ceilings are a peculiarity in many houses that add value to the building as it visually makes rooms more spacious. While they seem to look nice for many homeowners, providing insulation for such ceiling can be a real challenge.
To understand how to install insulation in ceiling of a cathedral shape, study the following recommendations.
- Seal all the openings in ceiling. Use a caulk gun to seal areas with visible plumbing or wiring. Check if there’re any openings or voids in the wall surface and joists. PVC pipes should be carefully sealed around as well. These preparations are performed to protect the premises from air seepage and will suppress fires.
- Install the baffle plates on vents. Also known as vent chutes, the baffle plates will make sure there’s enough air infiltrating for ventilation needs. The baffles come in prefabricated models, designed to fit standard measurements of the ceiling joists.
- Fix the baffle plate between adjacent joists firstly at the place of their junction at the external wall.
- Keep attaching the baffles to the internal side of the joists. Use a staple hammer for the purpose. Then cover the wall surface completely. The plywood sheathing is mounted at 1 inch distance beneath.
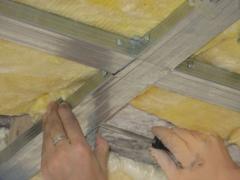 Lay the Kraft faced batts of insulation between the timber joists. The side covered with the Kraft paper should face downward. Keep to at least 1 inch space beneath the plywood sheathing of the roof to ensure appropriate airing.
- Fasten the paper protrusions to the joists by stapling them in increments of 8 inches. The surface of insulation must be in at least 3 inches away from any heat sources (chimneys, recessed lights etc).
- Proper distance between two adjacent joists is about 23 inches. If the intermediate area exceeds that value, staple some additional fixings across the insulation in order to keep the material secure.
- Start pressing the insulation batts between the timber joists at the top. Thus you’ll have a chance to correct the size of a batt if it needs to be cut and refit. It’s much easier to carry out cutting at the bottom, closer to the wall and to the floor.
Related Information:
The main types of roof insulation for private homes.
How to insulate basement walls on their own.
