Practical guidance on how to prepare subfloor, make required measurements, cut the planks properly and finally on how to install vinyl plank flooring.
 We recommend the following guide to all the homeowners who wonder on how to install vinyl plank flooring with their own hands.
Preparing to installation
Preparations are important, as they simplify the installation process and allow getting better-looking results and properly installed flooring.
Essential tools and accessories
You will need:
- Utility knife;
- Tape measure;
- Metal ruler;
- White chalk.
Optionally you may require some self-leveler (pre-mixed or in powder, at your convenience), plywood sheets, silicone mastic, carton and scissors, handheld jamb saw .
Necessary preparations
 Vinyl planks have to acclimate to the temperature, humidity and overall condition of the new room before installation. So unpack the planks and left them in the room at least for 48 hours. Note that the temperature in the premise should be kept of 18C or more.
You have to remove the basements and existing flooring. Some manufacturers say that vinyl planks can be put over the existing vinyl flooring, in case if it is one layer thick only. But we still recommend removing vinyl to provide proper adhesion between new flooring and the subfloor.
Make sure you prepared the subfloor well. It has to be dry, clean, flat, and smooth maximally. You may need to sand concrete subfloor to get off some high spots or self-leveler to fill up the gaps. Note that you have to wait until self-leveler becomes completely dry before you install flooring on it. If you have a wooden subfloor, you may need to cover it with plywood to make it precisely flat.
Certain types of vinyl flooring require underlayment; the others are thick enough to go without it. In any case, you have to check with the flooring manufacturer, whether your vinyl planks need some underlay.
If you decide to lay the planks on the concrete subfloor, check its moisture level. It should not exceed 70-75%, in opposite case you have to use damp proof membrane additionally. You may find more detailed instruction on concrete and plywood subfloor preparations on our website.
Planning the floor, taking measures, and cutting the planks
 In most cases, the walls in the room are bowed to some extent. Therefore it is quite important to plan the floor, so you can put the planks properly but not agley. To do that, measure the walls lengths and find the center of each wall. Mark it with white chalk. After that snap the lines between two opposite walls’ centers using your chalk. In result, you will get white chalk cross draw on the floor.
After that, measure the distance between one of the lines and the theу outermost edge of the wall, parallel to it. Mark this spot with the chalk. Admeasure the same distance from the line to two ends of this wall and put two more marks. Finally, connect all three marks in one line using chalk.
Now it’s time to calculate the width of the planks you will put to the last rows. Take the distance between the center of your room (chalk line that crosses the room) and one of the walls (chalk line that drawn near the wall) and count how many whole planks will fit in this distance. Note that you will have to cut some planks lengthwise or crosswise to fill in the space between last whole plank row and the wall. Do that before you start the installation. Double check all measurements and cut one or two planks first, to check if they fit in properly.
If you are planning to lay vinyl plank flooring in a bathroom, get ready to some additional work, as you will need to curve the plank to put them around your sink, bathtub standing,shower unit or toilet pedestal. In such cases, we suggest making special template of a carton or thick paper. Note that peel-and-stick vinyl planks are easier to cut, so consider using this type of flooring.
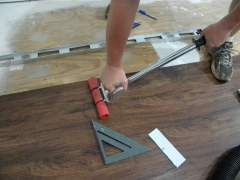
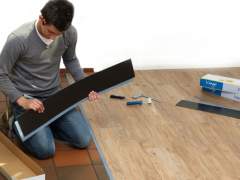
Use a sharp utility knife to cut the plank, helping yourself with a metal ruler. If the knife is not convenient enough, you can try using handheld jamb saw. If you are not sure how to cut vinyl plank flooring properly, take one plank and cut it in several pieces to practice.
Installing vinyl plank flooring
Installation steps depend on the type of planks (peel-and-stick), so we decided to describe this process for each type separately.
Floating planks
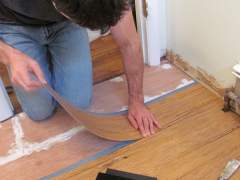
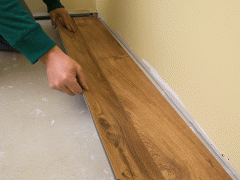
Start laying vinyl plank from one of the walls (at the chalk line). Take the plank and cut  off special tongue from its long side with the utility knife. You‘ll have to place this tongueless side to the wall. Put the first plank on the floor, take the second one and place it with its shorter side at a slight angle against the shorter side of the first piece. Accurately fold the second one and fold it down until you hear a slight click. Repeat this procedure until the first row is formed.
To begin the second row, take a plank and insert its tongue into the groove of the first plank of the first row. Rotate second piece until you hear a click. For the next plank, you will have to attach short sides first and then connect its tongue to first-row plank’s groove. In such a way you can install all the planks and cover all floor.
Peel-and-stick planks
Peel-and-stick planks are quite easy to install. You do not have to buy additional adhesives, as each plank is already covered with glue at the place of production. Take first plank and peel off protective coating from its bottom. Stick plank to the floor accurately, aligning it with the chalk line. Repeat the procedure again. Place the planks side to side tightly and make sure there are no gaps between them.
Finishing Tips
If you install vinyl plank in the bathroom, you will have to fill all the small apertures around toilet pedestal or bathtub with special silicone mastic.
After you put the basements back, make sure there are no gaps or holes between them and last vinyl plank row.
Don’t forget to clean your new floor after installation.


