Where to start wallpapering in a room of your apartment or country house while performing finishing works with your own hands.
Many of those who decided to perform wallpapering with their own hands face the serious questions – how to start wallpapering at all? where to start wallpapering in a room? This article contains detailed information on this issue. First of all, you need to choose the type of wallpaper, to calculate the desired number pf the sheets and get some glue. Calculating the number of rolls and the glue should always be rounded upwards, especially when you choose patterned wallpaper (consumption may increase by 20%).
- glue;
- scissors;
- a brush;
- a pen;
- a spatula;
- measure tape;
- a roller;
- a plumb.
Rules of wallpapering
 No matter where the work is carried out – in the bedroom, in the kitchen or in the hall – you will need to fulfill a number of conditions. Before starting your work, you need to prepare the room, covering all the furniture that you don’t plan to take away with the film. The walls should be cleaned of all the old coatings and primed. If the old finishing was not removed completely, it can ruin your future work.
Before you cut the first sheet of wallpaper, it is necessary to measure the desired height. The process can be performed as a measurement using measure tape and the wallpaper itself. Better do it with an assistant – it’s too uncomfortable to be performed alone.
Glue the cut sheet paying particular attention to the edges, and then leave the fabric for impregnation. In some cases the wall surface is covered with glue as well. Don’t leave the wallpaper sheets covered with glue for too long – otherwise it will become be unsuitable for the future job.
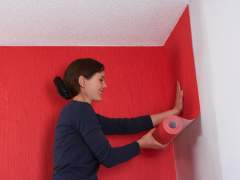
When applying the wallpaper sheet to the wall, the bottom edge bends to avoid dragging it across the floor, and then it’s transferred and bonded to the wall. Then smooth the wallpaper with a brush, with light movements, diagonally. All the excess adhesive and air bubbles are constantly removed – waiting for even 10 seconds can be cruel for the future finishing.
Where do you start?
Before the process you need to decide where to start wallpapering. Choosing a method is generally based on the type of lighting. Until a few decades ago the most popular method was “from the window”. But times have changed. Today, in everyday life there are different ways of wallpapering. For example, for vinyl wallpaper the old traditional method “from the window” is absolutely contraindicated.
The most popular ways of starting wallpapering
Vertical wallpapering should be performed super vertical, so the work begins at any suitable vertical point – and the door jamb is a perfect choice. The very first sheet should be stuck strictly vertical, using a plumb. Then, the wallpapering process continues sequentially in the selected direction.
- From the angle
This method is suitable only in case the room corners are perfectly aligned. But if they are – it’s hard to find better method of wallpapering than this one.
- From major landmark
If the room has a lot of passages and windows, the process of wallpapering is really better to start from the biggest landmark. For example, near the very big passage.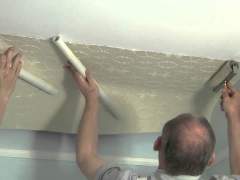
- From several lines
This method is used when a large window is provided indoors and wallpapering should be performed at different sides of it. For the joints to be less visible, it is better to do them over the windows and the doors.
How to keep rough corners vertical
Experts suggest one effective method – while wallpapering each of the two adjusted walls use a brand new vertical line. In this case, the last sheet on each of the walls will overlap the another one for about an inch.
We hope this article helped you to get proper information on where to start wallpapering in a room of your apartment or country house while performing finishing works with your own hands.
How to hang wallpaper
Wallpapers are considered as one of the most popular ways of wall decoration. Relatively quick installation, safety and environmental friendliness, as well as the opportunity to repair it with your own hands – it is not a complete list of advantages of this material. In addition, its analogues cannot boast such a wide variety of colors and shades, patterns and full of drawings. To make you stylish paintings look as well as in the manufacturer’s catalog and not fall down within a week, you need to learn in details how to hang wallpaper on the wall.
What do you need for wallpapering?
 If you are going to engage in self-repair, then be prepared to acquire not only supplies, but also the necessary tools. For this process you need to find:
- wallpaper
- construction knife
- wallpaper glue
- roller
- plummet
- two different size brushes
- wallpaper spatula
- bucket
How to calculate the amount of necessary wallpaper?
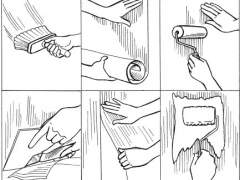 Not to throw away the excess material after the work completion and not to run to the store for a few more rolls, you need a responsible approach to the estimates. There are the standard 32 ft in a roll, which means that you may sufficient get only four pieces if the ceiling height is less than 8 inches.
To calculate the amount of required wallpaper, you need to measure the perimeter of the room. The resulting number is divided by the width of the roll (it may differ among different brands). Thus you will get the required number of cuts. The resulting value is divided by the number of cuts per roll, which was calculated earlier (depending on the wall height).
Be careful, these calculations are only valid for the wallpaper without pattern, since they do not need to join each other. If you get patterned wallpaper, then consider the margin for adjustment and fit. You can make it the easiest way during the calculation of the number of lanes on a roll, adding to a ceiling height of 1 ft more for cut docking.
Preparing walls for wallpapering
Under no circumstances, you should not begin the hanging process without preparing your walls. If there is glued wallpaper on the walls, it must be removed. If the walls were painted, then you need to get rid of the paint. Wallpaper is usually applied to a clean surface, or a paper substrate.
If previously the high-quality laminated wallpaper was used, you only need to remove the top layer, leaving a smooth wall. Otherwise, thoroughly clean the surface. The paint should be washed off or thoroughly sanded. After that, the wall is washed from dust and dirt, treated with primer.
How to hang wallpaper: step by step instructions
Once the primer is completely dry, you can start wallpapering.
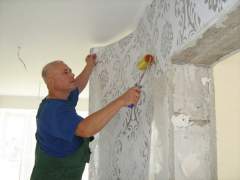 With the help of a plumb line draw a vertical flat strip at a distance of 4-6 inches from the corner. This is where you need to start the installation to make all the bands straight.
- Monochrome wallpaper can be cut into strips at once, but with the wallpaper pattern will need to join and cut as needed. You may conduct work on a large table, but the floor can also be an option. The surface must be flat and dry. Pre-clean the floor or place a clean polyethylene film there. Roll out the roll, measure out the desired length + a small machining allowance, then bend the strip and carefully cut with a knife along the fold.
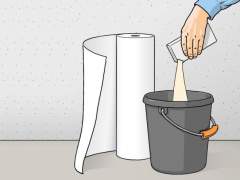
- It is also necessary to prepare wallpaper paste. Dilute it strictly in accordance with the instructions on the packaging. Try to prepare only the amount of glue that you need.
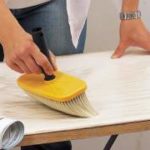
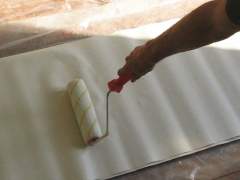
- In most cases, the glue is applied to the material itself, with the exception of a flizeline wallpaper base. In order to accurately perform the installation, you need to spread your cut on the floor face down and thoroughly go through a roller or wide brush dipped in glue. Then fold the wallpaper edges to the center, or in two, to give material a chance to be soaked.
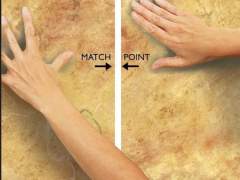 Carefully unstick this cut and place the upper part horizontally at the ceiling along the incised vertical stripe. Attaching the first half, level this surface, expelling air under the canvas with the use a special roller or spatula. The move should be going from inside to outside, gradually and consistently. It is better to remove excess amount of glue and immediately clean the surface with damp cloth.
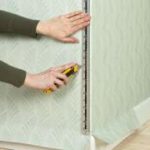
- Then glue the bottom part of the cut. Similarly, straighten all the bumps and get rid of the air. After that, the excess wallpaper on the top and bottom should be trimmed with a sharp knife.
- The new cut should be necessary glued joint to joint with the previous one. Thus you can not only avoid the curvature and differences in the pattern, but also to make the border less noticeable. If you choose wallpaper with a pattern, then preliminary try to fit painting and dock it with the already glued.
- All wallpaper borders should be coating with a special plastic roller or trowel, to ensure that they are well stuck. Be careful, if the manufacturer warns against using wallpaper roller then gently press down the edges just with your finger.
