What is a strip foundation. Its types, specifics of design, advantages and disadvantages of application. Stages of building strip foundation.
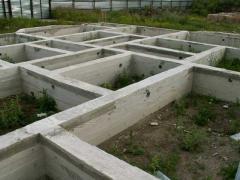
Strip foundation is a continuous concrete strip on which load bearing walls are built centrally. This represents a level base for the walls and its dimensions must be sufficient to allocate the load imparted to the foundation to subsoil area capable of supporting the building weight without excessive compaction. Today, for foundations developers mainly use concrete as it is easy to place, spread and level in the foundation trench. Due to its ability to harden concrete creates a basis for walls and develops proper compressive strength to support the foundations’ load. Previously, strip foundations were made of brick. They were installed directly onto firm subsoil or erected on a bed laid of natural stones.
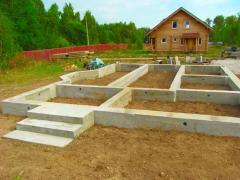 What is strip foundation width? It is predetermined by the bearing capacity of soils and by the alleged load. The greater load bearing capacity of the soil is the less the foundation width is needed for the same design.
If the strip foundation should be built on a sloping area, you will probably need to create a stepped structure. In order to properly step the foundation, total thickness of the top part of the foundation should be double the step height; or it must equal to 12 inches, if greater. To avoid possible need to cut blocks or bricks as well as to ensure stability of the future wall, the brickwork or blockwork performed later on is to tie in directly at the step.
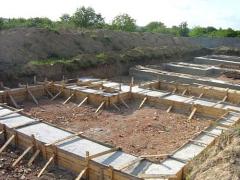 Deep strip foundation is known as the most used type and it is the cheapest method when the soil conditions are appropriate. A strip of reinforced concrete supports the walls. Depth of the trench can range, although it should be at least 40 inches deep 24 inches wide. The minimal depth of concrete should be 9 inches.
The foundation width is determined by the specifics of soil but the conventional minimum is 18 inches. However, your builder is likely to specify 24 inches; this is a conventional width applied for construction of two-storey houses.
Wide strip foundation. Foundation structures built on subsoils that have poor bearing capacity, for instance, soft sandy clays, must be significantly wider than the traditional strip foundations as it is necessary to allocate the load to a greater area of subsoil for higher stability. Excessive increasing of the width and depth of the structure in order to prevent wall shearing is not economically grounded. A reasonable option is to build a foundation using reinforced concrete. Reinforcing bars add tensile property to the foundation making the whole structure capable of withstanding tension and compression affect.
Advantages and disadvantages of strip foundations
Strip foundation has both positive and negative qualities. The positive may include simplicity of design, the possibility to build the foundation without expensive tools as well as its long-term operation. The negative qualities consist in a comparatively low durability, high cost in the final stages of construction (you must perform additional manual work, such as filling soil between the strips and its leveling, building floor and so on), inability to make monolithic binding of the floor to the basement.
When can a strip foundation be used?
 You can look through the building regulations to find out conditions under which strip foundation can be used. Note the following in detail:
- When planning the construction, consider the required width of the foundation strip denoted in building regulations.
- The concrete solution should meet the requirements of compatibility with the soil chemicals.
- The thickness of the concrete strip should equal to or exceed the projection of the external side of the wall, but not less than 6 inches.
- The step height shouldn’t exceed the thickness of the foundation.
- The foundation strip protrudes beyond the edge of piers, chimney forming side of the wall as much as it protrudes beyond the exterior surface of the wall.
Partitioning
Remove debris from the place and start partitioning by putting on the ground both external and internal borders of the future foundation. Use pegs or reinforcement bars and ropes.
When marking is done, you should explore variations on the surface of the construction site and select the lowest point to refer to when marking depth of the trench and to eliminate difference in the foundation height.
Preparation for construction of a strip foundation
- When the trench is ready, fill in a sandy base supplemented with gravel on the bottom.
- Foundation formwork is made of planed boards with a thickness of approximately 40-50 mm. When erecting the formwork, you should monitor its verticality all the time. The recommended projection of the frame above the ground is 12 inches. It is necessary to build a small base.
- The next step is building foundation reinforcement. Reinforcing bars with 10-12 mm section are bound with specifically designed binding wire so that the sides of square cells were equal to 12-16 inches. For the reinforcement you can use either steel or fiberglass reinforcing bars. When placing the reinforcement in the trench, watch indents from the edges. Optimum padding is 50 mm. In this case, the reinforcement will be most effectively located in the monolith.
Pouring concrete strip foundation
Pouring concrete is carried out immediately in the case of ready-mixed concrete or in layers, if the concrete is prepared independently.
- Preparation of concrete: cement is mixed with sieved river sand in the ratio of 1:2 – 1:2.5, and diluted with water to a liquid cream consistency, after which it is poured onto the prepared gravel. The amount of rubble corresponds to that of sand. Stir the mixture so that all the rubble got moistened with a solution.
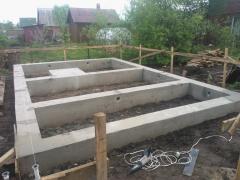 Pour the concrete into the prepared formwork. Pierce the concrete in several places using a metal bar and compact it with a wooden block to remove the remnants of the air from the voids.
- Pour the concrete to the level indicated on the formwork. Thus rattle the formwork from the outside for better slump of concrete.
- The top layer is aligned with a rule or trowel.
- Dust the concrete with sifted dry cement; you can do it through a sieve. This method lets top layer of concrete harden a bit and prevents its erosion and cracking.
- Cover the concrete with burlap or covering material and leave for 3-4 weeks. In dry weather, you need to moisten the top layer of concrete to prevent it from drying out.
Recommend:
