In modern society, personal space of people becomes more and more valuable. Any violation of it is very difficult to perceive and may lead to aggression. In modern megacities noise is a constant factor in the surrounding world. Cars, trams, advertising, the hum of aircraft, the cries of children on the street, a neighbor who has decided to drill a wall in the middle of the night – all this creates very annoying and traumatic sound background. A real salvation for people in this world of noise is to soundproof their premises. The article will be the parfect guide for those who womder how to soundproof a room properly.
During recent decades, the construction of apartment buildings is often performed using panel technology – this method absolutely doesn’t protect against noise and sounds. Why should the residents suffer? The reasons for bad soundproofing are numerous – thin walls, minor flaws in the construction process, some conflicts between the materials used – all this leads to the lack of comfort of the inhabitants. To mend such shortcomings of residential buildings, it’s necessary to perform the proper soundproofing of the apartment.
Soundproofing and noise insulation
Let’s start with a little bit of terminology: noise is a background set of sounds. Sound itself is a wave oscillation of the air medium. Noise can be structural and aerial. As for the air noise, it’s created by fluctuations in the air environment – voices, car sounds, screams outside the window, signals, sounds of hooters. As for the structural noise, in this case oscillations are caused by the influence on the transmitting material the building is made of. In this case, mechanical vibrations – caused, for example, by drills – are transmitted through walls and partitions to other floor of the apartment building – for example, from the second floor to the eighth one!
In old houses, the effect of noise is extinguished due to the thickness of the partitions and walls and the quality of the building material – vibration is extinguished by the porous material of the brick and plaster. In houses with thin walls and high vibrational conductivity of walls it’s really vital to soundproof the rooms.
Types of soundproofing
The first way to reduce the possibility of noise penetration into a residential building is to increase the thickness of the walls. It should be noticed, that in this case there will be less hearing of the sounds (for example, neighbor’s coughing), but it won’t save the residents from vibrating noises (for example, drilling on the ground floor).
The second method is the construction of structures made of several elements. These are soft soundproofing materials using for isolating noise – they reduce vibrations due to a porous or fibrous structure. Among them are mineral wool or expanded clay. Soundproofing foam may be successful, too.
Soundproofing can be:
- complete,
- partial.
Complete soundproofing work are carried out in the whole apartment, for all load-bearing planes – walls, floor, ceiling, windows, doors. Partial soundproofing means soundproofing of the living space only. It should be noticed, that complete soundproofing insulation of the apartment will require resources and strength, but the result is worth it.
Preparation for work
The first thing you need is to determine the source of noise and choose the type of noise insulation. For this, you’ll need to determine the following characteristics:
- the thickness of walls and partitions in the apartment,
- the type of floor,
- the type of windows and doors,
- the presence of holes, cracks, holes of various kinds in the walls.
Choosing how to make a room soundproofing, you’ll also need to estimate the height of the ceiling and the square of rooms. If you choose soundproofing with plasterboard and mineral wool, the square of the room will visually decrease. To pre-estimate the costs of the soundproofing works, you’ll need to determine the material costs per square feet. If the works will be performed by hired professionals, the cost is usually 150% of the price of the materials needed. But performing of these works aren’t particularly difficult, so it’s possible to perform soundproofing with your own hands.
The order of works
The complete complex of works of soundproofing has the following stages:
- replacement of all windows in the apartment,
- replacement of doors,
- sealing of holes and cracks in the walls.
- installation of modern outlets,
- soundproofing of walls,
- soundproofing of the flooring,
- soundproofing of the ceiling.
Modern industry produces a wide range of soundproofing materials. The most popular are cork wallpaper and special soundproofing plasters. The combination of drywall and mineral wool packing is still classic. It should be noticed, that such coating also has thermal insulation properties. If the apartment or house is equipped with ‘old-school’ windows – then they don’t protect residents from the noise at all. In this case you’ll need to install metal-plastic windows. For apartments with windows facing a busy street or a road, the windows should be double glazed. The installation of such windows is also of great importance for keeping heat in a soundproofed house. The same rule applies to the doors – both external and internal. High quality, well-fitting interior doors will perfectly isolate the internal sounds. Brands and manufacturers producing great modern soundproofing windows and doors sets are numerous on the market of USA and Canada today. One can choose products of suitable quality and price.
Soundproofing of the walls
The first step is to check the walls for integrity. In case of identifying cracks – even small holes, internal dilution channels, internal sockets – they all need to eliminated immediately. Cracks, holes, unnecessary channels are embedded in gypsum plaster. Sockets are installed with the closing of the slots after installation. If you want to use a low-budget version of soundproofing, choose plastering. For this you’ll need to buy dry plaster mixture. The ready solution must look good sour cream. If the spatula is stuck into the solution, then it’s of the desired consistency. The optimum proportion is one part water/two parts of the mixture. While using sand and cement, the proportion is three to one.
Photo from www.diynetwork.com
To prepare the walls for the plastering, you must clean them very well. There should be no parts of paint, wallpaper or other stuff on the walls at all. If it’s not possible to clean the walls thoroughly (for various reasons), then they are treated with an adhesive primer in several layers, then – with usual primer.
Next, you’ll need to set the beacons. They are set at the thickness of the plaster ball. Then the plastering is performed. The next step is leveling the wall. After the complete drying, walls should be painted or – best of all – covered with soundproofing wallpaper.
Gypsum cardboard soundproofing
If you decide to mount gypsum board insulating structure, you need to be prepared for the decreasing of the square of the room. The installation is performed as follows:
- Mounting of skeleton profiles to the flooring or the ceiling. The frame can be directing, ceiling-based or rack-mountable.
- A frame made of gypsum plasterboard or gypsum fiber sheets is assembled along all the walls.
- The carrier profile is inserted inside the structure. All profiles are marked by size. It’s very important for the structure not to be rigidly fixed to the wall – in this case it won’t isolate the room from vibrations.
- The profiles are insulated with rubber gaskets or tape insulation.
- A gap between the profiles and the walls must be of 5-6 millimeters. The gap is strengthened by a sealant.
- The frame is filled with filler-insulator (mineral wool). It should be laid very tightly. If this principle is violated, the structure may turn into a sound-conducting device.
- Polyurethane foam can be used to fill the profiles, which will also act as a sound absorber.
- The frame is covered with plasterboard. The sheathing may be laid in two layers, but in this case the layers must be offset relative to each other.
- The layers of drywall are set on glue, which also reduces the possible noise level.
- The walls are covered with putty, covered with wallpaper or painted.
Soundproof panels
It’s also possible to use modern soundproof panels. Such panels are attached to the walls with special protected nodes. They have very good noise absorption. The wall panels are mounted as follows:
- Fiberglass are set on the whole length of the wall
- The joints are sealed with silicone sealant.
- Panels are attached to the wall on anti-vibration dowel, gypsum cardboard is attached to self-tapping screws.
A possible option is the following – after sealing the cracks in the walls with their sufficient thickness you still may use soundproofing wallpaper. It’s usually a roll noise insulator, glued to the wall as a wallpaper primer. The thickness of the cushioning layer is 5 millimeters.
Other popular methods
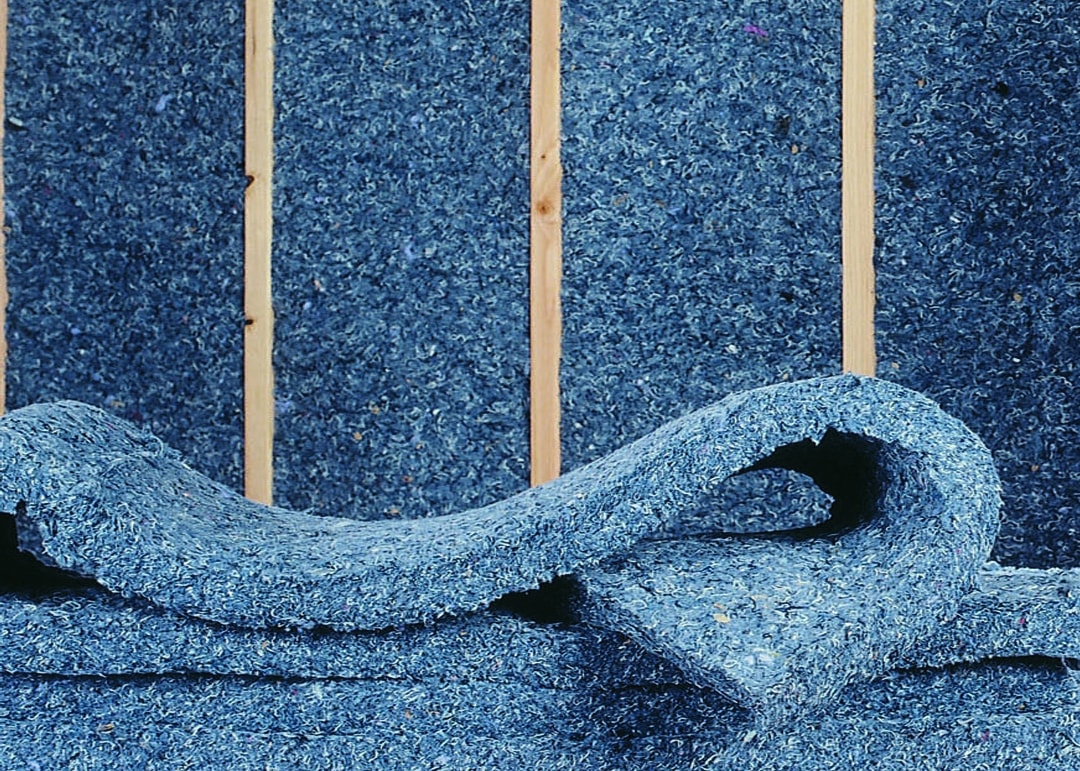
You can also perform noise insulation of the room walls with non-mineral cotton wool or cellulose fibrous insulation. They copes well with noise absorption due to their fibrous structure.
IMPORTANT! While carrying out the soundproofing works with your own hands it’s highly not recommended to use sheets of foam plastic – it provides additional heat.
Soundproofing of the ceiling
The work on soundproofing of the ceiling is basically similar to the one performed for the walls. Once again, it’s strongly recommended not to use profiles that are attached to the ceiling.
IMPORTANT! In the case of attaching the suspension directly to the ceiling, the effect of noise insulation won’t protect from vibrations along the monolithic surfaces of concrete ceiling slabs.
It’s necessary to use special ceiling suspensions or to mount the framework of wooden beams, the profiles are attached to them in increments, then the layers of drywall are laid. To do this, on both sides of the room you should mount walls goners with wings of about 4 inches at a height of about 4-5 inches from the ceiling. On the corners wooden bars of about 4*4 inches are fixed. Then you should fix the beams. The distance between them is about 4 feet. Rubber gaskets are placed under the beams. You can buy the ready ones or do them with your own hands. The profiles are laid on the uneven bars with a pitch of about 12-13 feet. They must be fastened very gently, as while working with the wooden bends.
Lattice construction is quite preferable. Again, just like for the soundproofing of the walls, you should block cavities with mineral wool and bury them with sheets of plasterboard (or gypsum fiber board). Two layers of material are best suited. Then you should perform puttying and coloring (pasting) the ceiling.
Very often a stretch ceiling is installed in modern rooms. The soundproofing works under the suspended ceiling are much simpler than while dealing with traditional method with the reinforcement of the frame on the ceiling structures.
To install noise insulation for a stretch ceiling, it’s necessary to fix the mineral wool in the plates to special dowels. Then the usual tension ceiling is assembled. Such constructions are not connected with the usual ceiling of concrete slabs through the profiles, so the sound simply can’t spread!
Stretch ceiling refers to the so-called two-level structures. There are two ways to deal with the stretch ceiling:
- harpoon system,
- wedge system.
The first one is a very simple and convenient way, which does not require special skills. Mounting of the retaining harpoons takes place at the stage of manufacture, so it’s very important to measure the size of the room very accurately. It’s necessary to order a piece of a stretch ceiling a little less than the actual area of the room.
Wedge method is carried out only by the hired professional workers. However, this method is universal due to the absence of a harpoon. Precisely held film sizes don’t need to be observed. It can be repeatedly pulled by cutting off unnecessary pieces.
Soundproofing of the flooring
To work on the soundproofing of floors, a special screed is used. It’s placed on a special ball of material being interlaced as well, which performs the noise isolating function. So, for the flooring you’ll need a special screed. As a material for the interlayer one may choose mineral wool.
The order of works is the following:
- removing the existing coating,
- cleaning the flooring,
- repairing deep pits,
- attach vibration-resistant gaskets to the edges of the walls above the intended level of the screed,
- strengthen beacons,
- laying insulating material along the beacons,
- fixing the sound insulating material,
- preparing a wet sand-cement screed (once again, it’s three to one) – it should be semi-dry, without water being released to the surface,
- filling the soundproof with a coupler over a thickness of about an inch,
- laying reinforcing mesh,
- laying the soundproof solution of the same thickness as in the previous case,
- leveling the surface with a level, remove beacons and wipe the surface,
- putting a finishing decorative layer on the floor covering.
Works on soundproofing of the room is a part of the soundproofing works of the whole apartment. In order to improve your premise, you need to carry out the same set of works on all the rooms of the apartment – hallways, kitchens, bathrooms, toilets, etc. Soundproofing works are no longer a luxury. In our world, where a constant noise background acts like a destructive factor causing much discomfort, adherence to the acceptable noise level is an important factor in saving people’s mental and physical health.


