Underlayment for laminate flooring, its main characteristics and peculiarities of the laying.
 If you read this article, you may wonder how to install underlayment for laminate flooring with your own hands. Here is the most useful information you need to know.
The main functions of the underlayment are:
- smoothing uneven subfloors
- creating a barrier to the penetration of water and vapor
- preventing heat loss
- reducing sound transmission
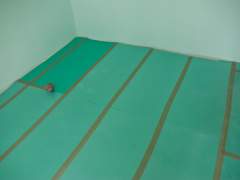 To lay the underlayment you will need:
- sticky tape
- a roulette
- a cutter
- a ruler
- a set square
- a vacuum cleaner
Order of works
- The first and very important step of this process is preparing the subfloor. Dispose of all irregularities of the subfloor, make sure the surface is completely dry.
- The underlayment and the laminate boards must be got under the doorframe. With this approach, you are guaranteed not to have creaking floor in future, and your flooring will have good look. Keeping this in mind, you should remove all the remnants of foam out of the jamb. If some free space between the door frame and the floor surface is still missing, you should not cut the laminate – pros recommend to encourage you to file a base jamb with a hacksaw for the laminate boards to be perfectly placed under it.
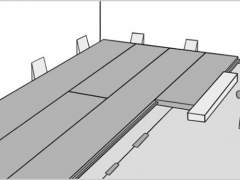 Measure the length and the width of the room to determine the exact area of the material that you will need. Complex mathematical calculations are not required – simply multiply the length by the width. To avoid extra visits to your local store, add to the resulting figure of 10% of the waste when cutting. The underlayment is sold in rolls and sheets. The most optimal choice is polystyrene sheets of the underlayment of 20 inches * 40 inches, with preferable thickness of 3 mm. The rolled material is a bit more hard in use.
- Start the underlayment under a laminate flooring with a corner of the room and continue until it covers the entire surface.
To notch flaws, you will need a set square (with perfect 90 ° angle) and a cutter. After you cut the underlayment in accordance with the desired shape and size, put it in its place.
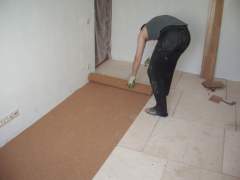 Now glue the underlayment sheets together using adhesive tape. Similarly, you can connect the individual sections into a single unit. Pros recommend to roll sticky tape into 20 inches – not more! Then press it carefully with your hands to stick it to the joint of two sheets of the underlayment. You mast not allow the underlayment sheets to overlap each other – it should be closely monitored by you every single moment of the work. You can use special dispenser for sticky tape, which will greatly facilitate the process of working with it. Glue all the joints of the underlayment sheets with sticky tape. This step is very important to create a waterproofing barrier.
- Thoroughly clean the surface with a vacuum cleaner.


